Tuesday, December 30, 2014

DIY New Year's Eve Wine Charms

0 comments

How cute are these little wine charms? Yesterday I shared a festive 2015 banner (HERE) and today, adorable matching wine charms. They were created to add some special homemade touches to New Year's Eve, but they can be made for any occasion. All you need are a few supplies, paper from me & my BIG ideas & the possibilities are limitless. Talk about a perfect hostess or housewarming gift!

Lets get to the creating!

You will need: Bottle cap necklace charms, small washers, one inch paper punch, mambiSHEETS, one inch clear epoxy stickers (I used Spare Parts from Hobby Lobby, hot glue gun, ribbon or twine

The process was super easy and didn't take much time at all. Here it goes!

1) Punch a bunch of one inch circles out of chosen paper. Make sure each circle is different (That's how each person knows which glass is theirs!)
2) Attach epoxy sticker carefully and rub on a hard surface to lessen air bubbles
3) Attach washer to the top of the bottle cap charm
4) Use hot glue to secure the domed circle to the bottle cap
5) Tie a pretty ribbon or piece of baker's twine to each cap
6) Make as many as you want and enjoy!!


I can't wait to use my new wine charms and I think I may just 
have to make more! :)

Come visit the mambi BLOG and read about the DIY 2015 Banner right HERE!

Be sure to have a fun & SAFE New Years!
Happy Creating Friends,

Monday, December 29, 2014

DIY 2015 New Year's Eve Banner

0 comments
Hello Creative Friends!

It has been awhile since I last posted here on Sadie Inspired, but I hope your holidays were full of sparkle and cheer. My Christmas was blessed, busy, full of love AND over in a blink of an eye. How about yours? I still can't believe that 2015 is coming at us in a couple days. Wow! 

As I begin (and I mean BEGIN...it takes me daaaaays) to pack away all my holiday decor, I thought it would be fun to share a 2015 banner I made using some me & my BIG ideas goodies, ribbon, and some cracker boxes. It was quick, easy and can bring a bit of festive happiness to New Year's Eve.


What you will need: old card board box (thin), mambiSHEETS Black & White Trendy Graphic, Gold Rush Jumbo Alphas, white doilies, vellum, mambiSHEETS Gold Rush, black ribbon, Gold Glitter Scrolls from mambiCHIPS, adhesive, gold acrylic paint, white cupcake cups, hot glue gun

I used old cracker boxes to cut out four triangle shapes and painted each one with gold paint. I used a bit more paint around the edges to give the shapes a bit more depth. While the paint was drying, I stacked some papers from the mambiSHEETS Black and White pad with a white doily and a white cupcake liner. Once I liked the way it looked, I added a gold foil jumbo number to the top. Now, I just repeated the same process for the next three.

After all the numbers were finished I glued them down to the triangles. I laid them out along some black ribbon and used my hot glue gun to attach them. Finally, I added a bit of embellishment for interest. 


It really turned out cute and looks darling hanging on a shelf in my house. I always love the color combintion of black, white & gold. It is perfect for 
a New Year's celebration!

You can find all these fun supplies right HERE.

Come back tomorrow when I share some festive wine charms that match this New Year's Banner. Too cute!

Happy Creating!


Thursday, December 11, 2014

Handmade Christmas - DIY Coasters

1 comments

I love making handmade gifts for Christmas. Not only does the art or crafting of the project ease the craziness of the season, but it also brings lots love to the receiver. I always love seeing the reaction when someone special opens up a package made by hand! Are you making anything this season?

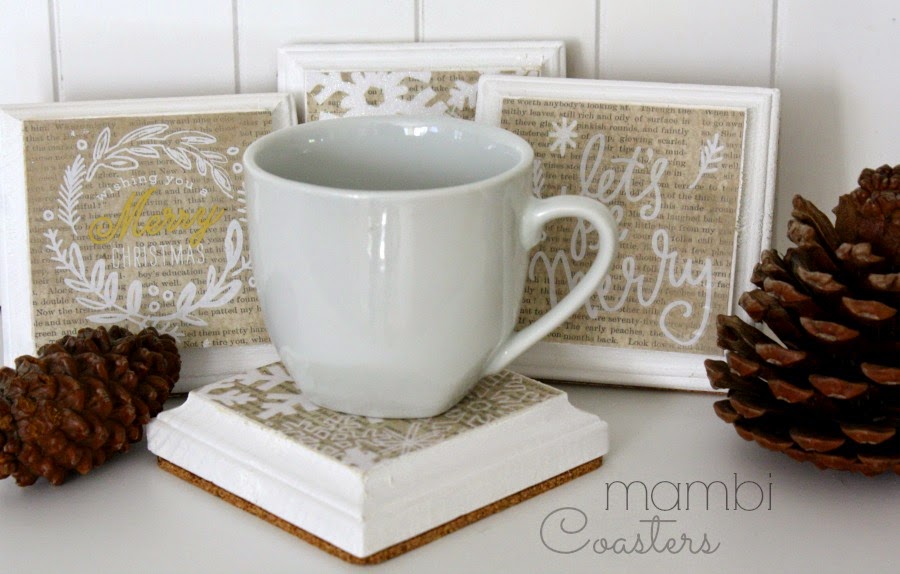
One super fun gift giving idea is making coasters! There are SO many different ways to put them together. Plus, they are super easy to make and you can pick up just about everything you need in one place (in my case Hobby Lobby). 


All I needed for this project was plain wooden coasters, paint, All That Glitters mambiSHEETS 12 x12 pad, pre-cut 4x4 cork pads, Modge Podge, and some beautiful Gold Foil mambiSTICKS. For the finishing of these beauties I used some spray protectant to keep the coasters safe from water damage and some twine. The tag was actually cut from a sheet in the mambi paper pad. 


You can see the process I used over on the mambi blog right HERE. Seriously, so fun and kids would love participating too. 


I also made these pretty coasters using a page from that same mambi paper pad. Isn't the white and gold gorgeous? I am slightly obsessed with this combo, so I fell in love with this paper! Swoon!! For these coasters I used square tiles rather than wood. Don't forget to spray these beauties with water protection too. 


I can't wait to give these to my friends. I think they will LOVE them!
Come see my project on the mambi BLOG

Happy Creating,

Monday, November 10, 2014

November Gratitude Journal - 30 Blessings

0 comments


Wow! I can't believe it is the second week of November. Seriously, I am not even sure there was an October. At least that is how I feel. In all honesty, it wasn't the best month for me. So, in order to "bring the mojo back" and focus on all the wonderful blessings in my life...I decided that November would be a fantastic time to make a Gratitude Journal or Mini Album. I have seen so many beautiful mini albums this fall (and in the past) that inspiration struck and I couldn't wait to get busy. 

Just recently, I received my me & my BIG ideas Design Team box too. Of course it was jam packed with so many inspiring products...perfect for this kind of project. I mean, LOOK at those gold glittery alphas above. Be still my beating (glitter loving) heart!

With gratitude on my mind and mambi goodies waiting to be used, I headed over to Hobby Lobby to find an album. I wasn't exactly sure what I wanted, but I knew I wanted to have some small pocket pages in the album. Well, let me tell you, as soon as I saw this Paper Studio 6x8 chipboard album I may have let out a joyous squeal. (Yes, art & scrapbooking supplies bring audible bursts of happiness. Ha!) The album only costs $6.99 (HELLO) and it was on sale at 40% or 50% off. Amazing deal, especially since it had 10 pocket style scrappy pages inside. Divine!


The best part about a chipboard album is that it can easily be altered. There is an endless list of fun things that can be done to jazz up the cover. Personally, I love kraft just the way it is. But, for this project I wanted to get messy and alter the cover. I used some white gesso and modeling paste on the outside of the album and decided to keep the inside plain.


After I was happy with the texture, I played around with stacking some beautiful mambiSHEETS paper with a white doily and some mambi Die Cuts. The stack was glued together and I used some alphaCHIPS and mambiSTICKS for the title. I added bits of gesso on the edges of the paper and added some thin twine (bakers) along the side. I really love how my Gratitude Journal turned out. I am going to have tons of creative fun reflecting on my many blessings this month. :)

Journaling for the first page shown is behind the bottom card. I attached a little tab to the journal card and tucked it behind the other. The tab can be spotted on the right side. Sometimes, I like to keep the journaling hidden or make pocket scrapping more interactive. 

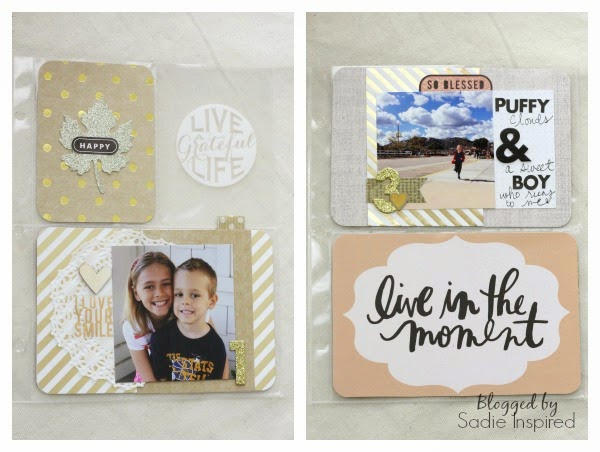
Here are a few of the inside pages. Since I plan on documenting my gratitude daily or every couple of days, I didn't want the inside pages to become too "involved." I wanted the process to be simplified, so I could focus on the thankfulness and not become overwhelmed. I think it did help that I spent some time (while watching the 2nd season of Downton Abbey) prepping the inner pages. I just added some pretty papers, journal cards, and a few embellishments beforehand. This makes the actually recording run much smoother.


Thank you SO much for stopping by! I'll be back later with more updates on my Gratitude Journal....plus updates from my shop (Holy smokes it's been awhile), prepping for my December Daily, Art Journal love, mambi Design Team projects, and plenty of fun for a creative Christmas!

Happy Creating,

Thursday, October 30, 2014

Fall Home Decor - Wood Blocks with mambi

1 comments
I LOVE decorating for fall. Don't you? I really don't decorate much for Halloween...just outside with some spiders, webs, crows, and maybe a few bats. Inside the house, I love to warm the rooms up with autumn colors, leaves, pumpkins, and anything I can find or alter to bring the season to life.

Today I have a super easy and fun fall project to share with you. The best part... I started with some old wood blocks I had in my "leftover bin" in the garage. (I have an old crate sitting in the garage to collect scrap wood from various projects my Hubby or I have worked on.) 


Here is a list of materials I used:

Old wood blocks
white paint 
white doilies
twine
small wood finials
mambi SHEETS - Mixed Media, Gold Rush & Straight to the Heart
mambi Fall Leaves Die Cuts
mambiSTICKS Large Alphas - Gold

I really love how they turned out! 
If you want to see the steps I took to make this fun fall home project, please come visit the me & my BIG ideas right HERE!


Happy Creating!


Thursday, October 2, 2014

mambi Design Team 2014-15

0 comments
I am SO excited to announce that I am a member of the mambi Design Team again this coming year! Super fabulous, right? It was so fun working with me & my BIG ideas, so I am thrilled to be a part again. Plus...seriously...LOOK at this amazing team. I feel fortunate to be among this group of super talented, creative ladies. OH, and don't let me forget to mention that we are being led by ever artistic Amanda Zampelli


All I can say is that there is going to be a whole lot of artsy goodness 
going on here at Sadie Inspired and right HERE. 
Also, be sure to pop over and visit all these amazing creatives too. 
Just click their names below the picture and off you go!


The mambi Design Team 2014-2015

Stayed tuned for lots of projects, pages, canvases, tutorials, DIY, mixed media, art journaling, POCKET PAGES™, and a much needed blog revamp. Woot! Woot!

PLUS, I have some more super exciting news to share! But, more about that later. In the meantime, here are just a few of my favorite projects from the last year with mambi. 


Happy Creating,

Sunday, September 21, 2014

Sunday Art Journal

0 comments
I wanted to share this sweet journal page I painted a couple Sundays ago. 


She is clothed with strength and dignity,
    and she laughs without fear of the future.


Proverbs 31:25


Man, I love that. It is such a good one...such a heart filler.  

Happy Sunday Lovelies...may your week be filled with laughter.
Happy Creating,

Tuesday, September 9, 2014

Adding Gesso to a Layout

1 comments
Lately, I have realized a few things about my creative self... 

1) I am obsessing over certain things like gold & navy, hot pink, all things herringbone, doilies, & Wilna Furstenberg (Her style is GOR-geous) 
2) I hoard Americana paint, chipboard albums, 3x4 Project Life style cards & scrapbook letters
3) I miss my art journal when I am away from it too long...like, seriously feel it. If I don't make the time to express on those pages...I am two steps shy of crazy.
4) If I was stranded on a deserted island I would want my family, water, & gesso. ;) You know I am not really being serious. But, I LOVE using white gesso. I use it all the time on pretty much everything.


SO, naturally when I found this GOR-geous picture of my daughter and knew I wanted to use it for a mambi Design Team project...OF COURSE, I had to whip out the gesso. Naturally. 

I don't ever really like anything super "perfected" when I am doing a scrapbook layout. Whether it is a 12 x 12 page, mini album, POCKET PAGES spread, or any other project I am working on. I like a bit of messy. I want the paper crinkled up on the edge, the layering staggered, nothing measured, gesso or modeling paste smeared somewhere, & ink splattered. Of course I love a pretty end result. However, the mixed media artist in me loves an imperfect bit of mess. :)


Now, you can see plenty of pretty paper (HERE is some) and darling stickers. But, to add some "mess" interest & texture I added some gesso along the seam where I connected the two papers. I layered some beautiful paper, SOFT SPOKEN stickers, Mini Banners, & some mambi Clear Expressions. Once the stack was glued down, I added some pretty golden yellow ink splatters. 


It is super soft and just the right touch of color. I love the way it looks with the black & white photo too. :)

Thank you for stopping by! Leave a comment, so I can come by and say "Hi!"

Happy Creating,

Thursday, August 21, 2014

Back to School 3x4 Lunch Notes

0 comments

It's that time of year again! Back to School is in full swing in our house right now. It has been a blur of activity the past two weeks as we adjust to our new non-relaxing, non-flip flop wearing, missing summer schedules. :) It has been a bittersweet return to the hustle & bustle of school. My youngest entered Kindergarten this year, so I am missing my little constant companion. But, let's be real....I know I can find things to fill my "alone time" pretty quick. 

One of the things I love to do during the school year is sneak little notes into my kids lunches. I don't add a note everyday, but when I do I know they love the reminder that I am thinking of them. 

So last week, during my "alone time" I started making a bunch of cards with some school themed me & my BIG ideas paper and goodies. Here are a few that will make their way into a lunchbox soon!


The base of each card is a folded piece of white card stock. I like to make the finished card to measure 3x4 so it can slip right into my page protector in my Project Life album. 


The construction of each card is very simple. I don't want the card making to become too time consuming. All the fun products makes it super fun. All I do is jot a sweet note inside & pop it in their lunch. I think my son will love seeing this one!


My daughter, who has officially become a "big kid" in fourth grade (where did that time go!?) loves getting a little message from Mom too. Man oh man, do I ever have to savor these elementary school years! Don't you feel the same way? I know pretty soon I will be sticking notes in her purse as she drives off to college. Yikes!


Also, I LOVE just using a 3x4 journal card like this one above that has a great message on it. I can just turn it over, write my message, and pop it in. Either way is special. Either way let's my kiddies know that I am thinking of them. Either way - they both know they are special. That makes this Mommy very happy!!

You can check out all these fun products in the mambi shop right HERE.

Happy Creating,

Monday, August 4, 2014

Art Journaling with Stickers - mambi Monday

0 comments
I always LOVE adding words to my art journal pages. I don't always add words or quotes, but more often than not I feel the pages are not complete until they have words. One fun and easy way to do that is to use stickers. Now, I don't know about you - but I have a ton of stickers. It also doesn't help that my favorite place is the scrapbook aisles at Michaels.

Today I wanted to share some of the different ways I have used stickers in my journal. Since today is Monday, I thought I would use some fab mambi stickers. :)


On this page I created a background using acrylic paint and doodled with some pens (Pentel & Gelly Roll). I loved using my new favorite paint colors - Navy Blue & Gold. The Follow Your Heart is a clear sticker from me & my BIG ideas. These stickers come in black & gold too!! 


I can't wait to use more of these on my pages. I would suggest using some gel medium or Mod Podge under & over the stickers. Although they really stick well, this will help them stay put for the long run.


I have been wanting to use these super large letter stickers in my journal for a long time. I love their size! Of course they come in all sorts of fonts and patterns, but the ones I used today were plain white. Perfect! I could make them any color I like. First I painted them with two shades of blue. Once that was dry I painted some gold over top. To add a bit of depth, I went around th edge of each letter with my black Pentel pen and a light brown Faber Castell Artist PITT pen.


I think these letters would be perfect for a home decor sign or some subway art, don't you? Hmmm, maybe I need to add another project to my list. :)


Finally, I added this really cool Choose to be Joyful sticker to this sweet girl. I cut the sticker apart because I didn't like the way it looked on the page as one piece. Don't be afraid to whip those scissors out and snip away. 


Once the sticker was Mod Podged down and dried, I used my favorite black pen again to add some interest around the edge. I don't want the page to look like a completed page with a sticker slapped on top. I want the sticker to blend into the background. Using pen or more acrylic paint always helps!

There it is! Three pages, using three different kinds of stickers  - and making me super happy. :)

You can find the stickers I used right HERE

Happy Creating,

Friday, August 1, 2014

The Journey of the Mixed Media Mini

0 comments
Yes! The journey of the mini book. I call it a journey because it has taken me a bazillion years to get it put together. (well, maybe not quite that much...but you get the picture) I initially painted these cute girls like a mad woman on a mission. One page right after the other. I was inspired. Then they just sat...and sat...and sat. Does that ever happen to you? I mean, I guess I know inspiration can hit like a tornado and create intense focus. BUT, I didn't want to loose steam on my little whimsy girl book!

SO, today I wanted to share some of the pages. Each page is made from some recycled food boxes like cereal or crackers. I busted out a ton of backgrounds, having a blast playing with different mediums. Then I would sketch and work on the girl. Finally I added a quote, scripture, or words. 

When I started the book, it had been awhile since I had my hands messy with paint. It felt SOOOOOOO good to sling some paint again. :) Seriously... my art table is my Happy Place. 

Grace Girl
I love her pink hair. I love the words too. Don't you? True love never really works without giving other people grace. It's hard for sure. Sometimes they don't deserve it. Sometimes I really have to dig deep in order to give someone else grace. AND...they have to do the same for me. Thank goodness I have such amazing friends and family. :)

Truth Girl
Hmmm, more pink hair. Maybe it's the secret desire that I want cotton candy pink hair? I don't know. It always shows up on my girls. Hmmm, maybe a pink wig for Halloween. 


Believe Girl
This sweetie is a bit different than the others. I just went with it. I was feeling something quirky. The great thing about doing a book like this - all faces - I really got a chance to play, try things, and enjoy my creative time. 

Dream Girl
Her dreams were BIG. Oh, yes! Don't you love that? I am no stranger to massive self doubt. SO the thought of BIG, monstrous, scary dreams makes my stomach quiver. In a good way though. You know the "loose sleep because I am so excited" kinda way...Or the "shout from the mountain tops" kinda way...the scary good way. :)

Loved Girl
She is my favorite. I love the way she turned out. She gets simple words. But, words that are so important. I have to remind myself all the time. That despite my faults & numerous imperfections - I am enough & I am loved. 

And, so are you...
Enjoy your weekend Lovelies!

Happy Creating,


Tuesday, July 22, 2014

Time to Spruce Up the House with Art

0 comments
Yes it is! It is time to spruce things up around here. It has been on my TO DO list over and over to start adding more to the walls around here. It is slowly getting done and man, does it make a difference! I am adding kid's art, my canvases, favorite pictures, mirrors, and prints. (Prints mainly free for personal use prints found online and from the NEW DIY Gallery Art pads from me & my BIG ideas.)


One of my favorite ways to add some pizzazz to our walls is to layer a print on top of some fab scrapbook paper. Below is a picture of a black frame I used for out master bedroom. All I did was add a matte, cut down this amazing script writing scrapbook paper to peek out behind a quote. SO easy and I love how it turned out. Script writing is such a hot trend right now. I see it everywhere. I always love bold black and white with a pop of color. This script writing paper came from a new mambi 12 x 12 pad you can find right HERE. I think it is also at Hobby Lobby.


We are also working on making my daughter's room a little more "grown up" and "fancy." Adding colorful, fun art to the walls always helps. Look how cute it would be to add this print to a scrapbook paper that looks like it is painted. This paper is another sheet from the Paint Pallette 12x12 pad. You could easily paint it yourself or just snag this sheet. :)


We have already collected lots of great art for her room from amazing artists like Danita, Danielle Daniel, and Michelle Allen. I can't wait to see it all put together. Hopefully soon!

Hope you are having a creative Tuesday!
Happy Creating,

Tuesday, July 15, 2014

Time for Some Summer Projects

1 comments
View at sunset from the front of our cruise ship.

Wow, time sure does fly! I can't believe it is already the middle of July. My kids start back to school in a month. CRA-zy.! We have been traveling quit a bit, so creative time has been cut short lately. My hubby and I just got back from our last summer trip to Philadelphia - which was a historical dream. I loved seeing all kinds of new things and making beautiful memories with my family. But, I am super excited to be back home and ready to find some artsy time for all the oodles of projects I have planned. I can't wait to share them! But, first here are some things I have been working on.


4th of July Decor
I had some scrap wood in my garage that has been screaming my name. So I decided to make a quick holiday themed frame for the 4th. All I did was glue three pieces of wood together. I attached some red and white paper from the me & my BIG ideas paper pad. I made a photo matte from more layers of paper from mambi. Then hot glued some rope for some decorative touches. Finally attached mini clothespins so the picture can be changed out if I wanted later.  It really took me no time at all! I have been waiting to use that super cute star paper and this project was perfect.


Sunday Mornings & Summer of Color

Any time I can find, I have been continuing my work on my Sunday Mornings class with Mindy Lacefield and the free blog event - Summer of Color 4 with Twinkle, Twinkle. I have not been able to link up my pages or travel around to all the wonderful blogs which is a bummer. BUT, I am still challenging myself to do the activities. :)


Little Love Cards

Eeeekkkk! Do I ever miss my kids when I travel with my Hubby. I love our "grown up" time together, but my heart aches to see the little sparkling faces of my kids. Whenever I do have to leave, I LOVE to leave little notes on their bed, in their suitcases, hidden in their room, etc. I just really want them to know that I am thinking of them. On this last trip I made these darling little cards using several different items from me & my BIG ideas. All their fun goodies make creating so easy. These only took me a couple minutes to put together & the kiddies loved them. Handmade treats like these always make people feel special. :)


Pocket Page Scrapping

Although I am "behind" on keeping up with my Project Life style album, I am still plugging along finishing weeks as I can. No stress. Just fun! This week 21 spread from 2014 was so relaxing to put together. The entire page is put together using me & my BIG ideas products again. That is why it was so easy!You can read about it right HERE!

Another page from week 22.....


Details about this page are on the mambi blog right HERE
Look how cute my son's writing looks. I love adding memorabilia like this into my album. Years from now pages like this will be a treasure. :)

What artsy, creative projects have you been working on? I'd LOVE to hear!