Showing posts with label Valentine's Day. Show all posts

Thursday, February 12, 2015

DIY LOVE Canvas from CHA 2015

2 comments

It's almost that time...Valentine's Day. In celebration of all the hearts and love floating about, I wanted to share a canvas I made for CHA 2015. This canvas was on display in the me & my BIG ideas booth and I was SUPER excited to see it in person. 

I made this heart inspired canvas after I fell in love with the paper from the mambi Straight to the Heart paper pack. I mean...wood grain, I love you repeated over & over in cursive and this darling heart paper. I was done. Swoon! 


Here is what I used: canvas, modeling paste, doilies, mambi Jumbo Gold Rush Alphas, Mod Podge, vellum, hot glue, Straight to the Heart paper, mambiSTICKS, and wood coasters.


I really loved how it turned out. I liked the contrast between the white & gray that I used with the gold. The little pops of red look great too. I love that the red is a super pretty muted red, not an in your face brick red. It worked well with this piece. 

This type of project doesn't have to be just for Valentine's Day either. What about a DIY Anniversary or Wedding gift for someone? Perfect right! I know I always love receiving gifts that someone made for me. Just gives the present a little bit more of love & magic. 


Happy Creating Friends!

Wednesday, February 12, 2014

Making Cards with Gelatos

0 comments

I am so in love with the Faber-Castell gelatos. They are so super fun and easy to use. It is always fun to incorporate new art supplies into the creative mix. I already had white, black, silver, and gold gelatos. I liked them so much that I wanted to add some new shades to my collection. When I went to Michaels to grab some, they only had the package with reds & pinks. I will have to make another trip to see if they have any new colors. Of course I am really WANTING the blue pack because of the aqua. :)

I thought these colors were perfect for some Valentine's Day cards. I made a few that were quick and easy, with supplies I had laying around. The first thing I did was cut down some white card stock to about 5 inches. I also grabbed some sheet music, washi tape, some Dear Lizzy paper, and my embellishment drawer. (I keep a plastic organizer with drawers by my table and one of the drawers is for embellishments. It is convenient to throw things in there that I find around the house, rescue from the trash or buy.)


After I gathered my creative goodies, I started to play. The gelatos really allow you to control the amount of color you want on your project. If more pigment is needed, I simply add more. Easy! It is also very easy to use stencils with gelatos. Just be sure to hold the stencil pretty firm so the gelato does not spread out too much underneath. It might...but, I actually like that.


I was using standard white card stock when making these cards. I had thought about using watercolor paper, but wanted to see how this card stock held up with the water. The paper did buckle quite a bit. If you want to have less warping a heavier paper would be a better choice. I like the way the cards turned out - but, flat they are not.


Look at that cute Dear Lizzy paper from the Lucky Charm collection. I know it is an older collection, but I LOVE it. I have a 12 x 12 paper pad that I am hoarding having a hard time using up. Is it strange to have paper make my heart skip a beat? Ha! My hubby has some competition. :)


The light pink gelato is so soft and pretty. It was the perfect shade for this card. Some vintage sheet music layered with a white doily, Dear Lizzy sticker, and a water colored heart came together beautifully.

I am looking forward to more creative play with my gelatos. SO fun! Do you have any? I'd love to hear about your gelato projects too!

If you are on Instagram, come say "Hi!" Find me @sadieinspired

Come back for a visit tomorrow when I share a special layout! :)

Happy Creating!!

Saturday, January 4, 2014

Fun, Festive Christmas Mini Album

2 comments
Happy New Year!
Can you believe it is 2014? I know I can't. I honestly can't believe Christmas already whizzed by too. It came so fast this year. I could not keep up. :) It was a beautiful time for my family, but man...I blinked and POOF - it was gone!

To keep the holiday cheer around for just a wee bit longer I like to work on Christmas mini albums in January with the loads of pictures I took. This year I used my iphone for so many of our pictures. SO convenient, right!? It takes such great pictures and it is so much easier than my big Canon. BUT...nothing beats the quality of the photos when I use my Canon Rebel. So, I did use it as well. What do you do with all your holiday pictures?


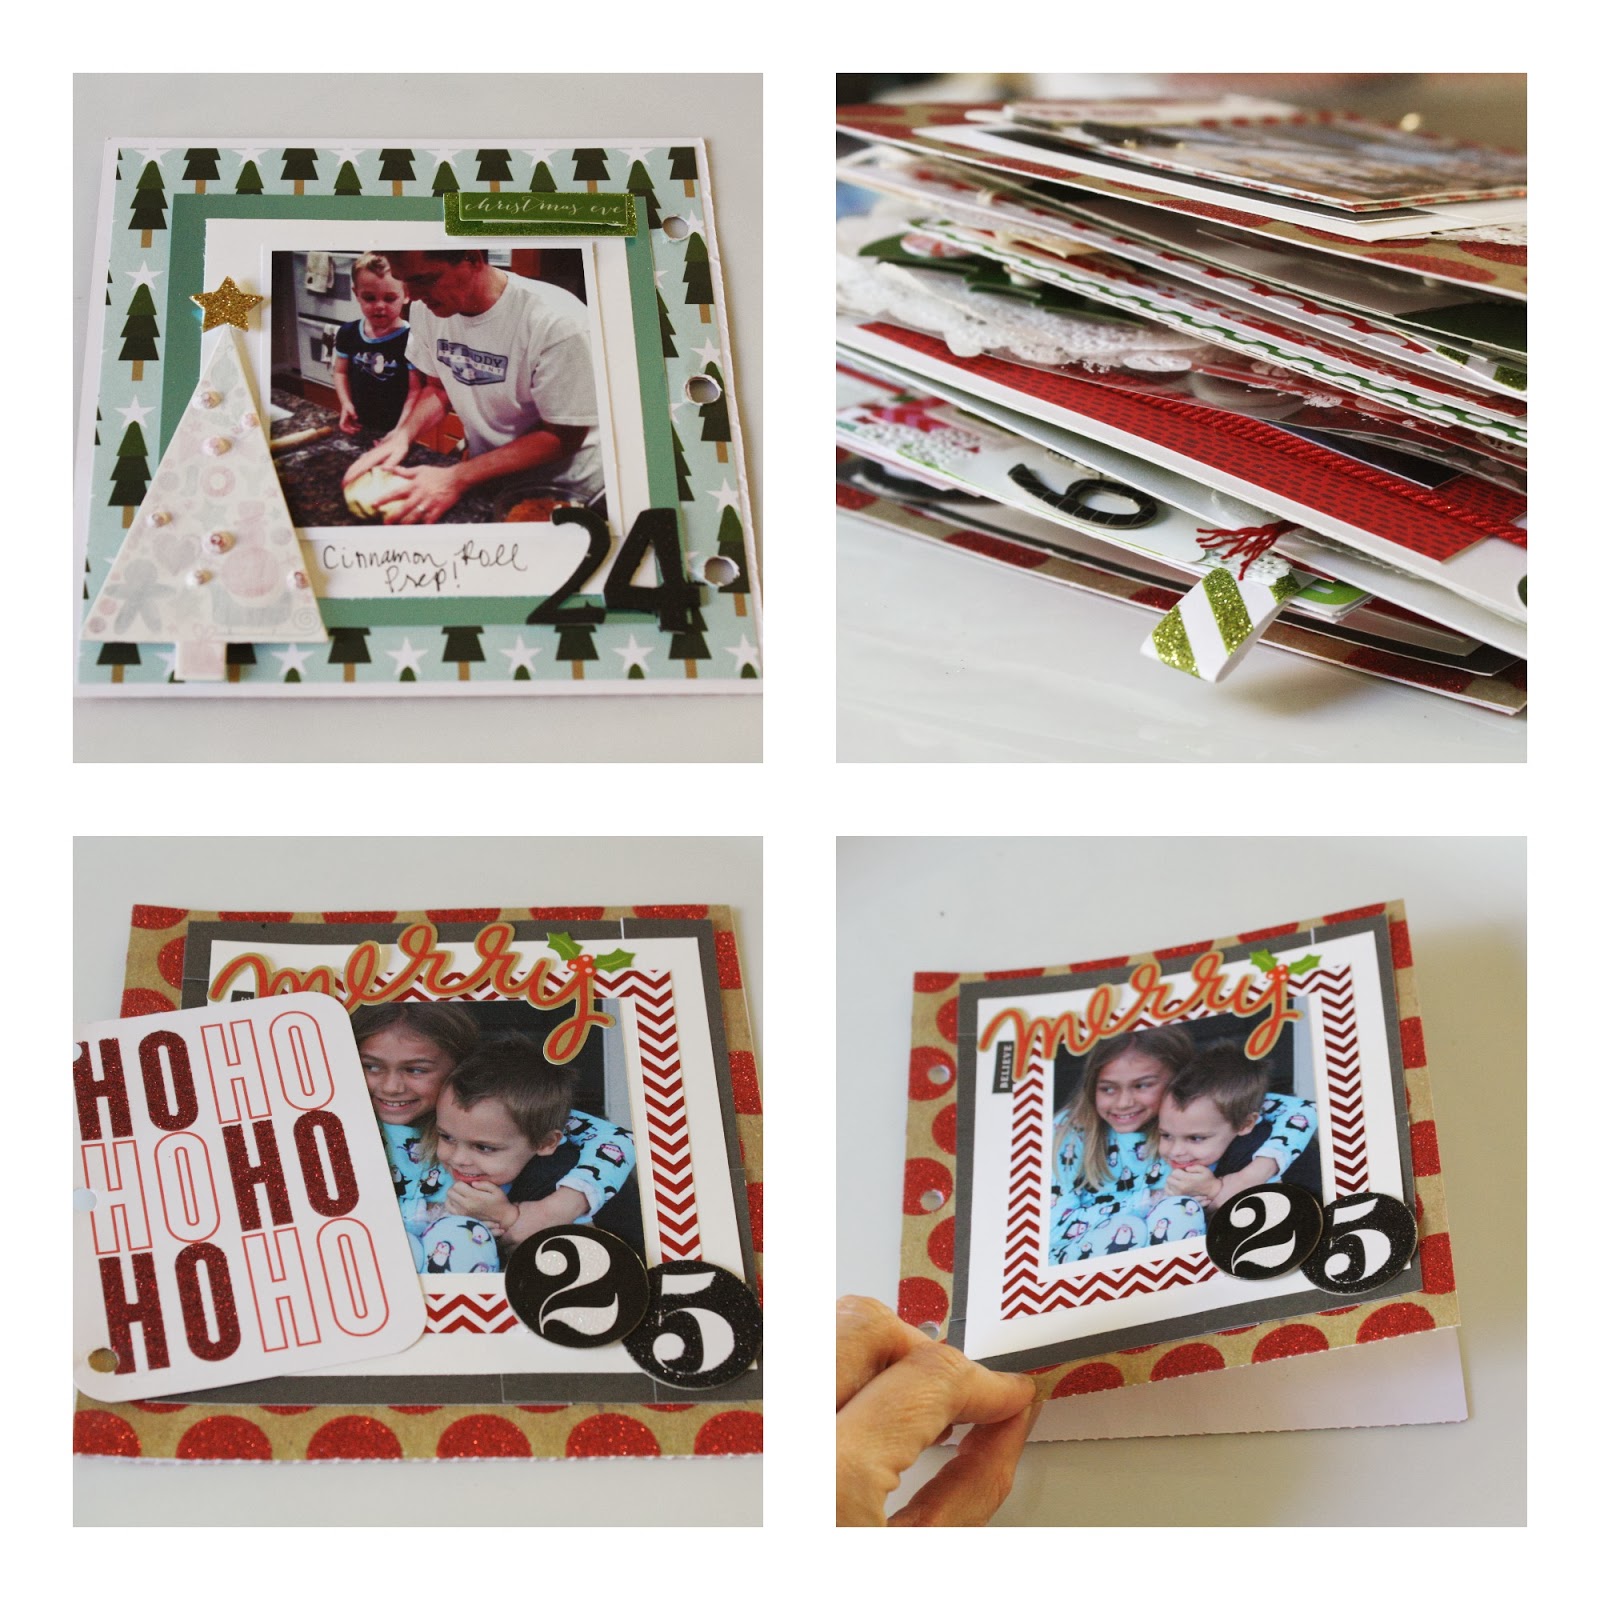
Today I want to share an album I made for 2012 with all kinds of Christmas goodies from me & my BIG ideas. It is a December Daily style of album where I made 25 pages - one for each day.

The cover is made from pieces of chipboard that came in some packaging. The interior pages were all made from the mambi CARDS in an INSTANT, 12 x 12 paper stack, and a few transparent pages made from an old office folder. Pages are super easy to make. All I did was fold them in half and run my tape runner inside to seal it shut. EASY!

On the transparent pages I used a stencil and white acrylic paint. Once the paint was dry, I added some festive stickers. Remember, whatever you use will be seen on the back. I always plan a little cluster of embellishments on the back too.

Pockets were easily made by applying adhesive to three side of a cute me & my BIG ideas Specialty Card, then sticking it down. It is a perfect place to hold things you collect like ticket stubs, receipts, tags for journaling, cards, etc.


You can see that I repeated the use of some elements like doilies and vellum to have some continuity throughout the mini album. That really helps the flow of any book you are creating. :)


Another tip: Sometimes certain paper patterns or stickers are too bright for what I am working on. I tend to favor neutrals, faded colors, watercolor, and small muted patterns. However, in this album I wanted bright, traditional, festive color. The tree in the upper left picture is a chipboard sticker that had a pattern that did match the page. The shape was perfect for what I wanted, so I simply painting some white gesso over top. Gesso can be your best friend! It is just right for toning down bold color.


Thank you SO MUCH for visiting! 
I am looking forward to working on this year's Christmas mini album, as well as my Project Life pages for December in the coming weeks. I will share it all!
I'd love to hear what you plan on doing with your holiday pictures.
You can also see this Christmas album featured on the mambi blog right HERE

Happy Creating,

Monday, February 25, 2013

DIY Crayon Hearts

2 comments
Being a former elementary teacher and a mother of two children, I have a lot of crayons laying around. I mean A-Lot! So, when my daughter's teacher requested non-candy Valentine's this year I knew exactly what we could try - heart shaped crayons. After showing my daughter some different pictures from Pinterest, she was super excited about trying to make them for her classmates.


The first task was taking the paper off all the crayons. I think this part took the most time. I used a small paring knife to slit the paper and then my little assistant pulled it off. This did take quite a bit of time, but it is well worth it!


After removing the paper, we separated the crayons into color groups using coffee filters to corral the crayons. Then we chopped the bare crayons into small pieces. Following some trial and error, we decided that smaller pieces of crayon would work the best. My daughter wanted a variety of color in each heart shape, so the smaller the better. 


I found a silicone heart shaped baking sheet at my local pharmacy of all places. Plus, we were making these pretty last minute so it was on sale. Score! :) Funny little side note...make sure it is a BAKING sheet and not an ICE TRAY. Lol. Let's just say that I didn't read the packaging very well on our first attempt and ended up with a melted mess. Ha! Anyways, we put the little pieces of crayon in each heart. I baked them at 300 degrees for 15 minutes. Be very careful pulling them out of the oven! I put the silicone tray on top of a cookie sheet for baking and cooling. It makes it much easier. Let them cool and pop them out. (Tip: Be sure they are completely cooled or they will break when you attempt to take them out.)


They turned out SO pretty! The colors were so GOR-geous and we had used a few metallic crayons too. They were our favorites. Making crayons like these would be perfect for party favors, birthday gifts, or teacher appreciation presents. They can be made in all kinds of shapes which makes it super fun.

We used some colored paper and cut them down to about 3 x 4. I rounded the corners with a picture corner rounder. Then I stamped the cutie little heart arrow from a stamp set I found at Joann's for one dollar. Adorable! I typed up a sheet on my computer with the saying, Valentine, You Color my World. Then cut each phrase out with fancy craft scissors to give them some pizazz. We glued them to the top and attached the heart using embroidery string. I punched two holes in the cards (can't see under the crayon) to secure the the heart. It was tricky figuring out how to get the heart to stay put. Eventually, I slipped these into a clear bag and sealed it with a heart sticker. I didn't want the hearts to fall out and break. My daughter and her friends loved them!


This was a really fun project! It is a perfect way to use up all those broken crayons in your stash and give them new life. I know I will keep my eyes peeled for baking sheets with fun shapes so we can try this again!

Happy Creating!

Tuesday, February 14, 2012

Love

5 comments


 Happy 
Valentine's Day!

I hope your day is filled with love, 
hugs, and goodness. 


Thursday, January 26, 2012

Love is in the Air

7 comments
I love Valentine's Day.
I think it is super fun to celebrate love.
Of course, I celebrate the loves in my life all year long.
But, it sure is fun to focus on them more intensely for a bit. :) 
So, with February right around the corner  
(come on time...slow down a bit...pretty please!)
there are many fabulous ideas floating around out there.

I thought I would share a few cutie things I found and
pinned to my board on Pinterest. 
I have to make something. I vow to make something.
I promised myself I can not just pin things &
not do anything with the ideas or inspiration.
I can not be a pinner (is that a word) & not a doer.
(That word makes me laugh. In high school my BFFs & I used "pinner" for skinniness. LOL. 
For example, "Like, OMG that outfit makes you look so pinner." 
You know, little like a pin and I went to school in the late 80s - everything started with "like.")

Let the heart fest begin....


Source: parents.com via Jen on Pinterest


Do you like to craft or decorate for Valentine's Day??
Let me know if you are a Pinner too, so I can add you to my list 
and feed my addiction! :)

XO,

Saturday, January 14, 2012

Little 4X4 Canvases

33 comments
4x4 Canvas - just getting started

I saw some of these little cuties at Michaels and just couldn't pass them up.
How adorable, right?
Little 4X4 canvases... too cute.


I brought them home thinking they would be super fun additions to my shop.
Small originals that wouldn't take too long to complete and reasonably priced.


I started thinking about Valentine's Day and February too.
So much LOVE in February.
Not just Valentine's Day, but my anniversary the day before, 
my son's birthday, and 
my mother in law's too - 
lots of celebrating.

I started to think that making a series of love inspired mini canvases 
would be a perfect theme.
The attributes of love....perfect!

I started with 1 Corinthians 13 for inspiration.


Love is a beautiful thing.
Real love...unselfish love...the way it was designed.

I am having a great time getting started on my wee little pieces of art.
I will list them in my shop soon!


I am joining all the creativity at Paint Party Friday and Studio Sneak Peek!
Have a loved filled weekend. :)