Showing posts with label supplies. Show all posts

Wednesday, February 12, 2014

Making Cards with Gelatos

0 comments

I am so in love with the Faber-Castell gelatos. They are so super fun and easy to use. It is always fun to incorporate new art supplies into the creative mix. I already had white, black, silver, and gold gelatos. I liked them so much that I wanted to add some new shades to my collection. When I went to Michaels to grab some, they only had the package with reds & pinks. I will have to make another trip to see if they have any new colors. Of course I am really WANTING the blue pack because of the aqua. :)

I thought these colors were perfect for some Valentine's Day cards. I made a few that were quick and easy, with supplies I had laying around. The first thing I did was cut down some white card stock to about 5 inches. I also grabbed some sheet music, washi tape, some Dear Lizzy paper, and my embellishment drawer. (I keep a plastic organizer with drawers by my table and one of the drawers is for embellishments. It is convenient to throw things in there that I find around the house, rescue from the trash or buy.)


After I gathered my creative goodies, I started to play. The gelatos really allow you to control the amount of color you want on your project. If more pigment is needed, I simply add more. Easy! It is also very easy to use stencils with gelatos. Just be sure to hold the stencil pretty firm so the gelato does not spread out too much underneath. It might...but, I actually like that.


I was using standard white card stock when making these cards. I had thought about using watercolor paper, but wanted to see how this card stock held up with the water. The paper did buckle quite a bit. If you want to have less warping a heavier paper would be a better choice. I like the way the cards turned out - but, flat they are not.


Look at that cute Dear Lizzy paper from the Lucky Charm collection. I know it is an older collection, but I LOVE it. I have a 12 x 12 paper pad that I am hoarding having a hard time using up. Is it strange to have paper make my heart skip a beat? Ha! My hubby has some competition. :)


The light pink gelato is so soft and pretty. It was the perfect shade for this card. Some vintage sheet music layered with a white doily, Dear Lizzy sticker, and a water colored heart came together beautifully.

I am looking forward to more creative play with my gelatos. SO fun! Do you have any? I'd love to hear about your gelato projects too!

If you are on Instagram, come say "Hi!" Find me @sadieinspired

Come back for a visit tomorrow when I share a special layout! :)

Happy Creating!!

Saturday, January 4, 2014

Fun, Festive Christmas Mini Album

2 comments
Happy New Year!
Can you believe it is 2014? I know I can't. I honestly can't believe Christmas already whizzed by too. It came so fast this year. I could not keep up. :) It was a beautiful time for my family, but man...I blinked and POOF - it was gone!

To keep the holiday cheer around for just a wee bit longer I like to work on Christmas mini albums in January with the loads of pictures I took. This year I used my iphone for so many of our pictures. SO convenient, right!? It takes such great pictures and it is so much easier than my big Canon. BUT...nothing beats the quality of the photos when I use my Canon Rebel. So, I did use it as well. What do you do with all your holiday pictures?


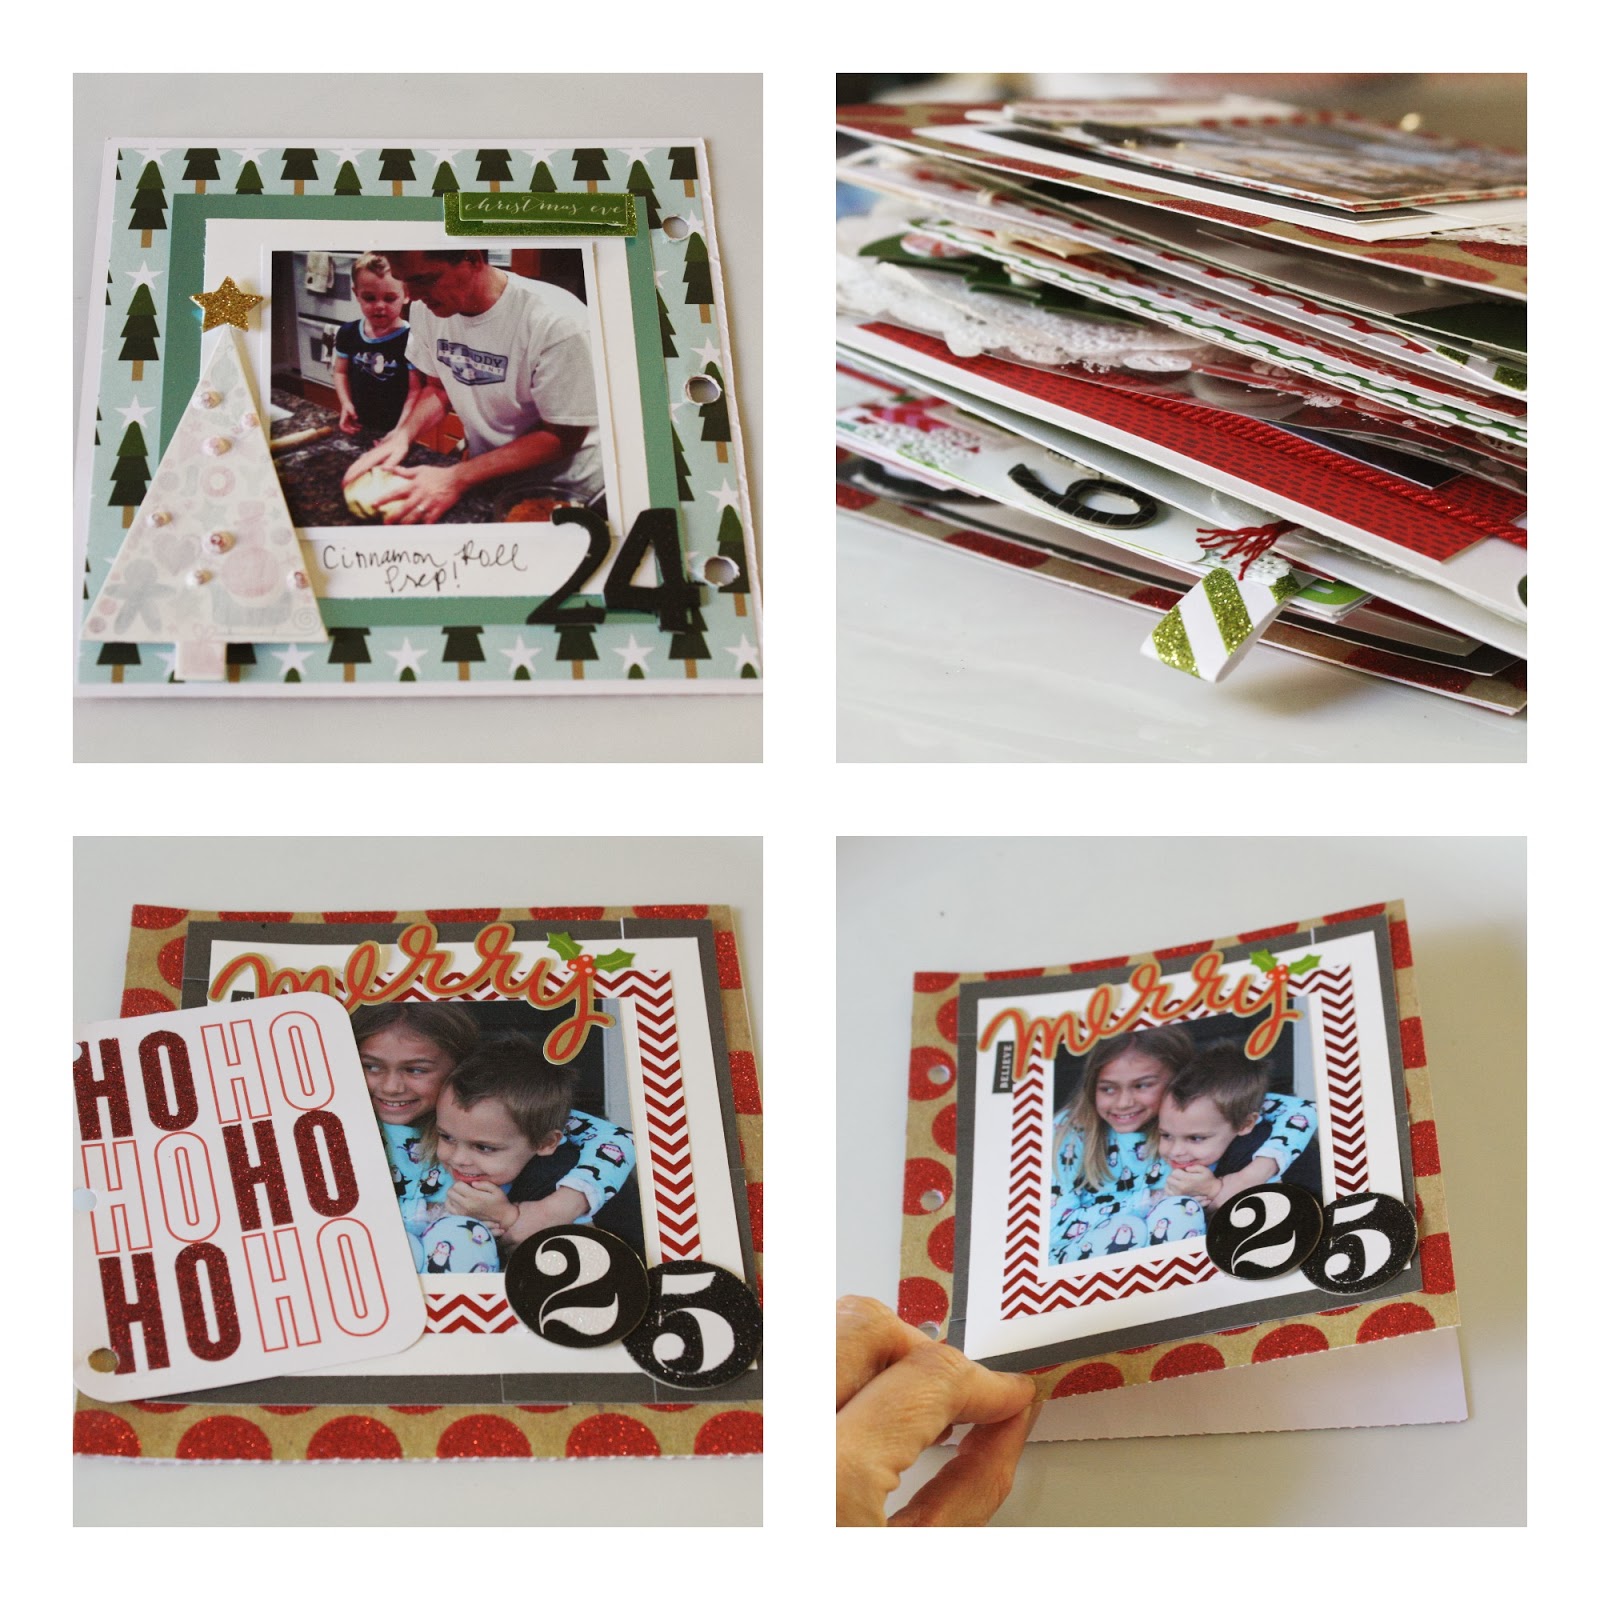
Today I want to share an album I made for 2012 with all kinds of Christmas goodies from me & my BIG ideas. It is a December Daily style of album where I made 25 pages - one for each day.

The cover is made from pieces of chipboard that came in some packaging. The interior pages were all made from the mambi CARDS in an INSTANT, 12 x 12 paper stack, and a few transparent pages made from an old office folder. Pages are super easy to make. All I did was fold them in half and run my tape runner inside to seal it shut. EASY!

On the transparent pages I used a stencil and white acrylic paint. Once the paint was dry, I added some festive stickers. Remember, whatever you use will be seen on the back. I always plan a little cluster of embellishments on the back too.

Pockets were easily made by applying adhesive to three side of a cute me & my BIG ideas Specialty Card, then sticking it down. It is a perfect place to hold things you collect like ticket stubs, receipts, tags for journaling, cards, etc.


You can see that I repeated the use of some elements like doilies and vellum to have some continuity throughout the mini album. That really helps the flow of any book you are creating. :)


Another tip: Sometimes certain paper patterns or stickers are too bright for what I am working on. I tend to favor neutrals, faded colors, watercolor, and small muted patterns. However, in this album I wanted bright, traditional, festive color. The tree in the upper left picture is a chipboard sticker that had a pattern that did match the page. The shape was perfect for what I wanted, so I simply painting some white gesso over top. Gesso can be your best friend! It is just right for toning down bold color.


Thank you SO MUCH for visiting! 
I am looking forward to working on this year's Christmas mini album, as well as my Project Life pages for December in the coming weeks. I will share it all!
I'd love to hear what you plan on doing with your holiday pictures.
You can also see this Christmas album featured on the mambi blog right HERE

Happy Creating,

Friday, August 16, 2013

Martha Stewart Gesso & Goodbye Summer

0 comments


Holy Smokes! How are you? All I can say, is that I blinked and summer disappeared. Literally...poof! My family and I had a wonderful time enjoying the warm weather, a fab vacation to Mammoth Lakes, baseball games, and all the good things that summer bring. I am so sad to see it go! My daughter just headed back to school this past Wednesday, so it is back to schedules, homework, and busy! I am happy to say though, I live in southern California...so the flip flops aren't going anywhere for awhile. :)

As I was packing up artsy goodies for our family trip to Mammoth and a Hubby & me trip to Vegas, I knew I wanted to bring along some gesso. I use it all the time. It is my absolute "go to" product for pretty much anything I am working on. I didn't want to bring my large container of Liquitex, so I ran over to Michaels (I seriously should work there) to see what I could find.

I found a small bottle of gesso by Martha Stewart that looked perfect. It was just a little bit bigger than a bottle of craft paint. I also HAD to buy this inexpensive Artist Loft set of watercolor. I mean, I HAD to - they shimmer! I am a lover of all the shimmer, the shine, the glitter, the sparkle. So these looked like a ton of fun. When I got home, I tossed them in my bag thinking I would have time to give them a try. 


 Fast forward to Mammoth. We did a whole bunch of this...


 ...so, there was not a lot of time for creating. Which was fine with me!

 But, when my husband & I went to Vegas, I had plenty of time. He had conferences all day so my art journal kept me company. I really liked using the Martha gesso. I liked trying something different. The consistency is pretty fluid, but grainier than the Liquitex. Once I spread it out over the page it became much more creamy in texture. It is thin and shows layers well, which I like. You will need to use a couple of layers if you want something completely covered though. I am going to stick to my favorite Liquitex, but I will also love changing it up from time to time. Hmmm, or better yet...maybe another mini vacation! Hint. Hint. :)

  
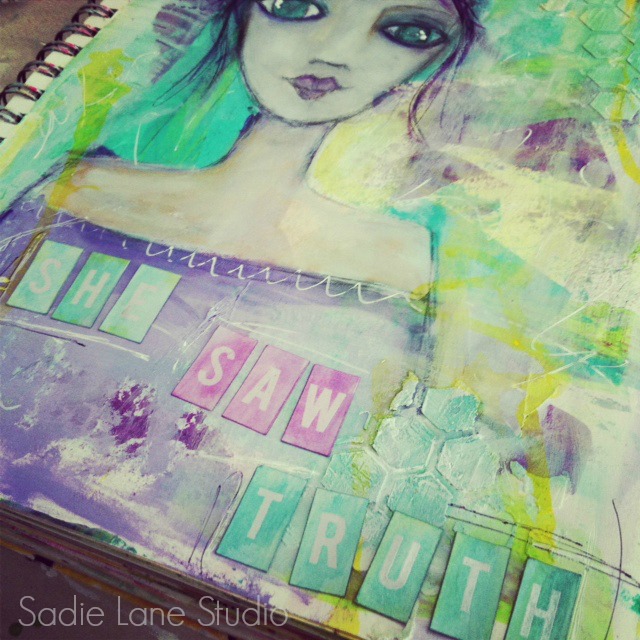
I got started on this girl while in Vegas and finished her up at home. I used some of the watercolors too. I'll talk about those later on in another post. But, let's just say - I love them! I also used some alphas from Heidi Swapp that can be inked, misted, or painted to change their color. I loved using them too and can't wait to do more projects with them. 


I hope you have had some fun creative time. Are you working on any projects?
DO tell...and HAPPY creating!

Don't forget to come find me on Instagram!! I'd love to see you over there.
I am @sadieinspired


Wednesday, April 24, 2013

Using Martha Stewart's Stucco Paint

0 comments
It's always a lot of fun trying out new artsy or crafty products isn't it? There's always a bit of mystery involved. It might be homemade, bought, or given. No matter the case - a lot of creative fun is sure to be had. A couple places that often have crafty goods for lower cost are stores like Marshalls or TJ Maxx. Many times I have gone in search of something as innocent as socks and end up coming out with 6x6 paper pads, notebooks, stickers, Thickers, and other random goodies. Ha! At least they are a good price, right!? :)

A couple of weeks ago, while on the hunt for new shoes for my daughter, I found some Martha Stewart Stucco Paint at TJ Maxx. I had never used it before and thought it was probably something like modeling paste. Now, you know I adore modeling paste (especially Liquitex) so at $1.99 for the jar - I couldn't resist. It is no where near the size of the Liquitex tub, but I just wanted to give it a try. Plus, it's Martha! How could I go wrong?


When I was ready to play a bit with it, I opened it up and found it to be exactly what I thought -  thick consistency, perfect to be applied with a palette knife or popsicle stick. It is a lot like modeling paste, but definitively not the same "creamy" texture. Liquitex modeling paste looks a lot like butter cream frosting to me. It actually has a really pretty texture that can be pulled up into peeks, much like cupcake frosting. If I didn't know any better I would smear in on top of my dessert :) The Martha Stewart has a must grainier texture to it.


I tried my best in the collage above to show the difference in texture. The Liquitex is on the left in all three pictures. Can you see the creaminess? But, the point is to use it on canvas for texture and not eat it! Sooo, let's see how it works on a tag using a stencil shall we?


1) Martha
2) Liquitex (swoon)
3) Both tags side by side
4) Mixing in a little Martha Stewart craft paint (which I adore)

I can see the gritty texture of the MS brand in all of these pictures and after working with it, prefer my good ol' Liquitex. But, the stucco paint would definitely do the job of adding texture to any mixed media project. Some people may even prefer the grittier version. Either way texture is created! I am glad I picked it up. (They totally stick all these random goodies in the purchase line. It literally called my name. Seriously! Along with alphabet stickers and nail polish. Ha!) I will use it all up in a few projects and think it was a good artsy buy.

Have you tried anything new lately? 
Do tell!

Tuesday, August 21, 2012

Art Journaling & Fabric Spray

2 comments

 A couple weeks ago I was walking the 5 trillion aisles at Hobby Lobby and came across Sei Tumble Dye fabric spray. I have been wanting to try some ink sprays like Dylusions, but just haven't ordered any yet. So with an inexpensive $2.99 price tag, I thought I would give these a try. Now, don't be shocked. I bought one bottle to start. Can you guess which color?? Yes, I am a complete creature of habit - turquoise. :)


I am loving them...serious BIG fat, sparkly love


I went back and bought a pink one too. After using these two for a week, I am sure I will be back to get some other colors. ($2.99!! Score!)


They work beautifully with stencils, come in an assortment of colors, dry quickly, claim to be non-toxic, and don't cost much! Perfect for my art journal, creating layers in mixed media backgrounds, or tie-dyeing a 60s inspired Halloween costume. :)


Have you used ink sprays? What do you recommend? I'd love to hear!!
Until next time, happy creating!

Saturday, August 4, 2012

Hotel Art

5 comments

For the last couple of days my Hubby has had a conference in San Diego. Lucky me got to tag along and enjoy some relaxing, kid-less days (Oh, they are OK...Grandma & Grandpa took them to Disneyland). Downtown San Diego is such a fun town with so many things to see and do. We went out to celebrate a friend's birthday, saw a Padre game, and spent some time in the Gaslamp District with fabulous friends - but I knew during the day I was going to be on my own. What a perfect time for some hotel art!


I wanted my art packing to be easy, portable, and hassle-free. Right!? So, here is what I brought along....


1) Pencil bag (pink and glittery of course) filled with all my writing essentials: Micron pens, mechanical pencils, Gelly roll pens in various colors, my waterbrush (a must have for travel!) and a black Sharpie. I was also able to fit 2 clear stamps, a black Staz On stamp pad, a glue stick, and 2 bottles of the Liquid Pearls.

2) A 2 pocket folder to hold all my fun papers and rub ons. I just grabbed a few things from my scrap bin, tore out some book pages and stuck them in there. Easy peasy!!

3) My gorgeous Inktense pencils. These are SO great to travel with. They have such vibrant color!! I was able to stick a small bottle of white Liquitex acrylic paint in this pencil bag too, but I forgot paintbrushes so I didn't use it. Small stencils fit in here nicely too. :)

4) I used a small plastic soap container to hold my Neocolor water-soluble crayons. It is a perfect place to keep them protected. It doesn't hold all of them, so I choose some of my favorite colors.


One of my favorite things to do while I am arting and traveling is to doodle with a black Sharpie. It is super relaxing!


After I doodled away, I colored it in with the pencils and crayons. Then let the waterbrush do it's magic.

Some Instagram love... Find me @sadieinspired

Of course, while in San Diego I couldn't stay up in my hotel room all day in creative bliss (well, OK...maybe I could!!). Sunshine was calling my name, so some pool side reading was in order. :)


So the next time you take a trip, throw some arty stuff in a bag and do some creating. You never know when you might have some down time! :)

Come find some creative inspiration right here!

 PS I have had to turn on the little comment code thing. I was being hammered by spam mail - yucky! I hope to turn it back off soon to see if the problem was solved. But, please still come leave a comment...I BIG puffy heart LOVE them! :)