Monday, February 25, 2013

DIY Crayon Hearts

2 comments
Being a former elementary teacher and a mother of two children, I have a lot of crayons laying around. I mean A-Lot! So, when my daughter's teacher requested non-candy Valentine's this year I knew exactly what we could try - heart shaped crayons. After showing my daughter some different pictures from Pinterest, she was super excited about trying to make them for her classmates.


The first task was taking the paper off all the crayons. I think this part took the most time. I used a small paring knife to slit the paper and then my little assistant pulled it off. This did take quite a bit of time, but it is well worth it!


After removing the paper, we separated the crayons into color groups using coffee filters to corral the crayons. Then we chopped the bare crayons into small pieces. Following some trial and error, we decided that smaller pieces of crayon would work the best. My daughter wanted a variety of color in each heart shape, so the smaller the better. 


I found a silicone heart shaped baking sheet at my local pharmacy of all places. Plus, we were making these pretty last minute so it was on sale. Score! :) Funny little side note...make sure it is a BAKING sheet and not an ICE TRAY. Lol. Let's just say that I didn't read the packaging very well on our first attempt and ended up with a melted mess. Ha! Anyways, we put the little pieces of crayon in each heart. I baked them at 300 degrees for 15 minutes. Be very careful pulling them out of the oven! I put the silicone tray on top of a cookie sheet for baking and cooling. It makes it much easier. Let them cool and pop them out. (Tip: Be sure they are completely cooled or they will break when you attempt to take them out.)


They turned out SO pretty! The colors were so GOR-geous and we had used a few metallic crayons too. They were our favorites. Making crayons like these would be perfect for party favors, birthday gifts, or teacher appreciation presents. They can be made in all kinds of shapes which makes it super fun.

We used some colored paper and cut them down to about 3 x 4. I rounded the corners with a picture corner rounder. Then I stamped the cutie little heart arrow from a stamp set I found at Joann's for one dollar. Adorable! I typed up a sheet on my computer with the saying, Valentine, You Color my World. Then cut each phrase out with fancy craft scissors to give them some pizazz. We glued them to the top and attached the heart using embroidery string. I punched two holes in the cards (can't see under the crayon) to secure the the heart. It was tricky figuring out how to get the heart to stay put. Eventually, I slipped these into a clear bag and sealed it with a heart sticker. I didn't want the hearts to fall out and break. My daughter and her friends loved them!


This was a really fun project! It is a perfect way to use up all those broken crayons in your stash and give them new life. I know I will keep my eyes peeled for baking sheets with fun shapes so we can try this again!

Happy Creating!

Wednesday, February 20, 2013

10,000 Hours & A Journal Page

2 comments
My daughter is a dancer. She has been dancing since she was four...just an itty bitty thing then. Now, she tells me that her dancing will help her when she is an actress and singer. She is 7. Watch out Hollywood! ;) It is an amazing thing to witness the seed of a dream. You know what I mean? The first time someone starts to really speak of what they want. Of course over time things can change - but, the beginning is truly breathtaking. 


We recently switched to a new dance studio, and my little performer is having to work her little tail off to "catch up" and train differently.  We have had many talks about dedication, time, and effort. I think the key to it all is finding what makes your heart soar... your passion. Then it doesn't all seem like a chore. You should have seen her little determined face as she practiced turning over and over again last night down our hall. As she worked and worked, I could slowly begin to see her face fill with joy. Not because she was doing the turn "right" or "perfectly", but because she was trying her hardest and getting better. It was joy sprinkled with pride and accomplishment. 


 Recently my hubby said that in the book Outliers by Malcolm Gladwell, he states that is takes 10,000 hours of practice to master a skill. 10,000 hours! Seems like a ton of time and it is. That's a lot of dancing or painting, gardening, singing, cooking, snowboarding...or whatever it may be. It reminded me that I need to show up at my studio table. Just get there and paint. I need to make time...every day. If I am going to get those 10,000 hours in I need to get busy. Lol. I surely don't want to become a master of blog surfing or pinning. Ha! I am not really serious about that, but you get what I mean. Time management! :)

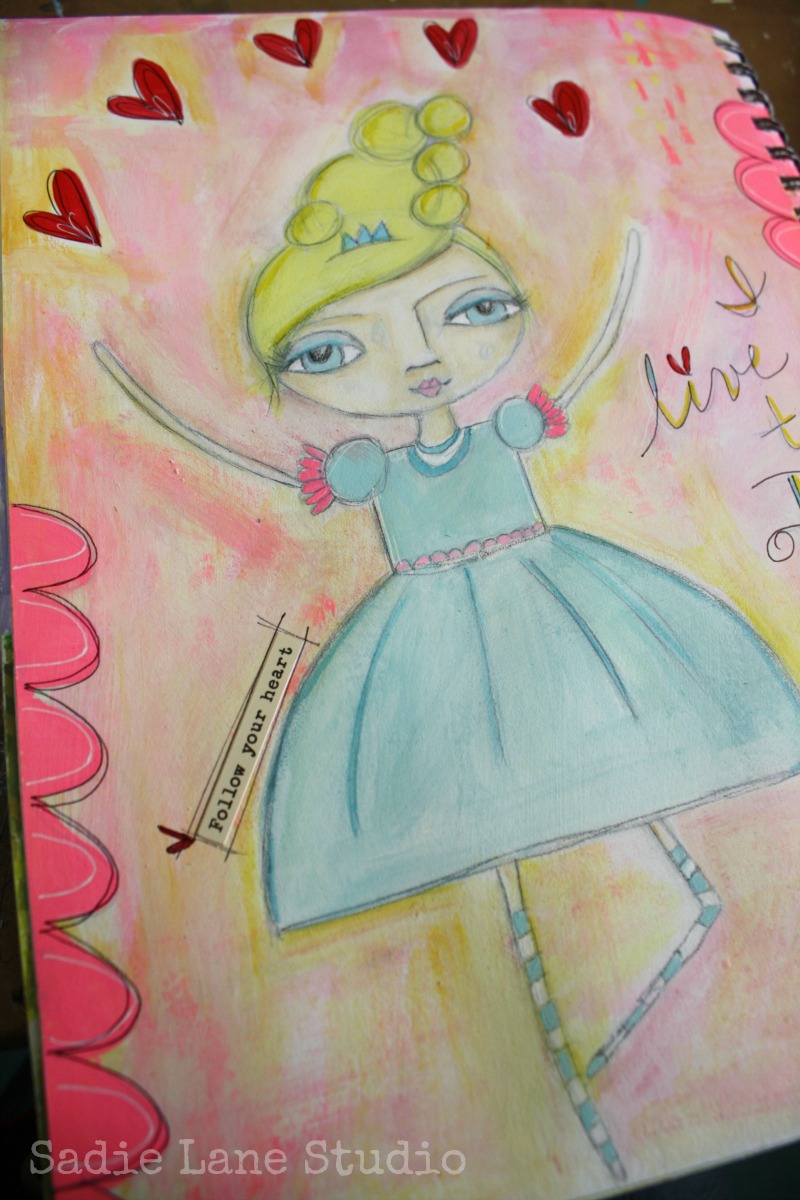
With all this dance on the brain, I painted this sweet little dancer last week. Obviously inspired by my very own darling twirler made it very fun for me. Just a quick sketch, a layer of gesso, and some acrylic paint. I used watercolor crayons too as usual.


 I found these word/phrase stickers that I thought would be fun for my journal. They have a very artsy, creative theme. Super fun! The company that made them is Cosmo Cricket and I spotted them in the scrapbook section at Joanns.


I added the words, "follow your heart" along the side of her dress. 
That's what I want for my little Sugarbean - you and me too...
No matter what it is or where it may take you...follow.
AND dream...dream BIG! 
The journey will be worth it! :) 


Tuesday, February 12, 2013

Yellow and Gray Inspiration

5 comments

I love the combination of yellow and gray. Do you? When I paint, I love to use all kinds of bright colors - aquas, pinks, oranges. But, I also really like to pair a bright (or even in the pastel version of the color) with a more muted color like gray. I think the contrast is really pretty. 

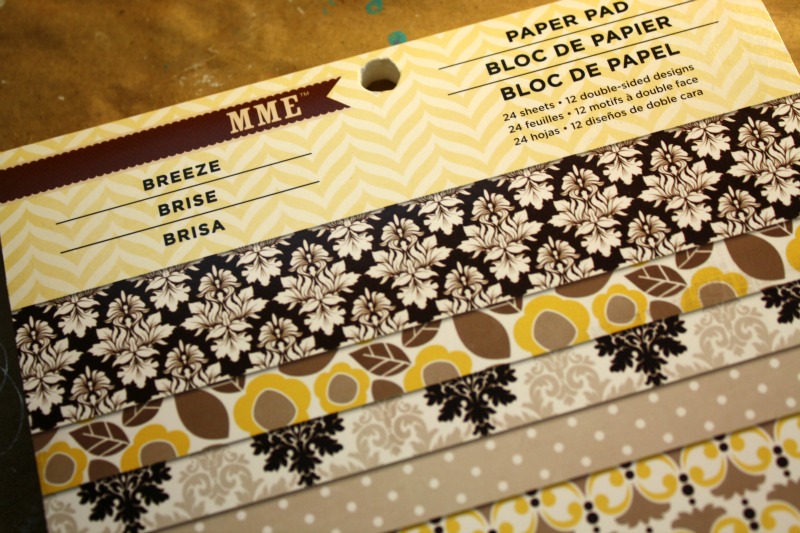
  While I was wondering the aisles of Michaels (I know, I know, I have a problem. Ha!) I found some fabulous scrapbook paper by My Mind's Eye. It was in a little 6x6 paper pad which I love. That size works really well for background paper. The patterns are shrunk down compared to a 12x12 sheet, so the small size looks great on the canvases or journal pages I work on. The colors in this pad were a perfect jumping off point. Sometimes paper is all you need for a little inspiration. LOVE. L.O.V.E.


So with this My Mind's Eye paper as my inspiration, I used an old wood block that I had laying around and started to cover it up with the pretty paper. I have quite a few of these blocks laying around. I did stock up around the holidays (sales + gift cards = happy camper) with canvases, but wood is my favorite. It is super cost effective to go to a home improvement store and have some wood cut down to the size you prefer. Well, or have a very handy hubby cut the wood for you. :)

After attaching my papers with Mod Podge, I threw on a layer of gesso. Then hunted through my stash of paint to find my pretty yellows and grays (pictured above - so yummy! Right?). Besides the color choices, I planned on just letting the piece come to me. No real thought as to what I wanted to paint - just the colors.


From the background I began to see a face emerge, then a headband with a feather (I have seen a lot of feathers lately) and then the words...be brave in truth. Right? I love that saying. I love the word brave. There are so many degrees of bravery aren't there? But, I know for me...speaking truth and trying to be true to who I am & my tender, sensitive heart takes a bit of courage. 


Here she is all finished and just waiting for a varnish bath. After that she will be on her way into my shop. :) 


What color combinations are inspiring you lately?

Friday, February 8, 2013

Artsy Insta Friday

13 comments
Even when I can't write a full blog post (where does my time go?), it is always fun to capture little bits of creativity with Instagram. Are you on Instagram? (If you are, let me know in the comments so I can come find you!) Not only do I love sharing what I am up to, but I LOVE seeing all the artsy goodness from the wonderful people I follow. So much loveliness - crafters, scrapbookers, artists, Project Lifers, home bloggers, mommies, and friends. It is a super fun and shall I say a wee bit addicting. :) I guess there are things more terrible than Instagram to be addicted to! Here are a few "artsy Instas" from my world lately ...

Playing with the idea of feathers and little whimsy characters. She says, "being brave is not always easy."
Portrait on a wood block. Inspired by yellow and gray. Post coming soon.

LOVING my new Faber-Castell Gelatos. I only have 4 colors and want more!

Working on a journal page

Creating little goodies at a Stampin' Up! party.  SO fun!

A bright journal page WIP


I had to throw this one in of my dog. We joke that she is a chihuahua trapped in a Golden Retriever's body. She does not realize how big she is! She wants to be a lap dog. :)

I hope you have a wonderful, love filled weekend!
(Find me on Instagram @sadieinspired)

Also, come visit the artists at Sneak Peek Friday and Paint Party Friday too!

Tuesday, February 5, 2013

"Be True" Art Journal Portrait

3 comments
Hi! Happy Tuesday. How is your week going? I think I am ready to get it started now after the post Superbowl bloat caused by too much food! I needed Monday to re-coop. :) I did find time to work on a two page spread in my art journal yesterday. My little man was a busy bee taking apart some toys with a screwdriver. Lol. I think I have a future engineer on my hands. He LOVES taking things apart and putting them together. Anything that occupies an almost 4 year old is a little slice of heaven!


So on with the pages!! I already had these two pages splashed with some color in my journal. Like many of you, I use pages in my journal for excess paint or to clean off brushes. So these pages had smeared paint and some extra book pages glued down. Doing this allows for a great jumping off point. Plus it is a little less intimidating than a blank page. I really liked the purple and blue that was already down on the page, so decided to go with that color palette. I don't use a lot of purple, but have some really pretty Americana colors I wanted to use. 


I sketched a face that I saw in the background and decided to add some very basic shaped flowers. Loose and fast is my painting mantra lately, so I kept repeating that in my head. :) Since both pages had the blues and purples I decided pretty early on that I would use both pages together. Let me just say a little something about the Strathmore Visual Journal...I am in big, fat juicy love with it. No holding back. They need to hire me and let me swoon about it for hours. Ha! I know some people may not like the fact that if you are doing a 2 page spread like this, that the coil can be seen. Do you know what I mean? When you make your own journal, alter a book, or purchase some like this - the pages are continuous. No coil ring thing...just a crease. I don't mind it at all. I love that the paper can handle just about anything. What about you? What is your favorite journal??


My goodness, I can get sidetracked! OK. Journal. Focus. :) I added acrylic paint, various stamps, and stencils to add texture. Another great find for me were these chipboard letters by Tim Holtz. The chipboard is pretty thin and bends a bit which is different from other chipboard letters I find. I picked them up awhile ago on sale at Joanns. The great thing about these letters is that I can alter them and make them any color I need.


You can see in the bottom left that I was trying out some larger, thicker white letters. They are really sparkly - so that almost got me (who's with me!? Sparkly loving girls please raise your hand). But, I stuck with my initial idea to alter the Tim Holtz letters. I used gesso to make them white. Added some purple Stickles to give them just a little glimmer. Then added some darker purple acrylic paint around the letters to give them some contrast. In the picture it is hard to see the letters, because I made them close to the background color. I really like the way they look though.


I wrote, "Be true to who you are."
So true.
Don't change for anyone you lovely person you.
Be your gorgeous self - AND shine! :)

Friday, February 1, 2013

Alice Journal Page

10 comments
I love Alice in Wonderland. Don't you? I  have always loved the Disney version and the book. When my daughter was younger with her long blonde hair...I always thought she looked like Alice. Plus, with a total obsession with all things Disney as a little girl, she had the CUTEST Alice costume. The other night Alice in Wonderland was on TV, so I snuggled up with my kiddies and watched it. So much color and interesting shapes in that movie!


So feeling very Alice inspired, I painted this journal page. I thought it would be super fun to paint one of my girlies like Alice. I wanted it very whimsical and sweet. I started with a pencil sketch...very loose and quick. I work best that way. Quick, so I don't get carried away thinking too much. If only I could expend that thinking energy towards finding a way to make laundry disappear in this house. Ha!


After a thin layer of gesso, I worked on the background with watered down acrylic and inexpensive Artist Loft watercolors. I used more acrylic for her body and the groovy purple shape going vertically up the page. I used watercolor crayons and more gesso for her face. As usual I added detail with pen and my Faber Castell PITT pens. Finally the stamped words and some purple sparkle.


The rabbit makes me laugh. His expression is too funny. He is like, "Um, WHAT do you think you are doing?" I am hoping to find a little metal clock to glue to his belly. Don't think that would be cute? I think it would be a fun addition. I guess I will have to go hunt in the scrapbook aisles of Michaels. Oh Darn! :)


 Well, that's it. That is my whimsical, little page. I hope you enjoyed it and I hope you enjoy the coming weekend (TGIF!!). 

But, before I go... my heart is melting...


Happy Creating! :)


StudioJRU