Friday, December 20, 2013

What to do With All Those Christmas Pictures

5 comments
I don't know about you, but I take A LOT of pictures. Digital cameras and phones make everything so easy to just snap, snap away. Around this time of year there are SO many opportunities for picture taking madness. In the past I have talked about my need to get pictures OFF the computer and OUT so my kids (and guests) can enjoy them.

This last year Project Life has been a fantastic, fun, and creative way to do just that. For Christmas, it allows me to print my pictures and quickly get them into an album to enjoy. My goal is to have my 2013 album finished (or close to complete) by December 31st so we can look through it on New Years Eve. I think it will be super fun to look back over the past year.  :)


Here is an example of one of my December pages from last year that I recently made (still working on that one). I used everything from me & my BIG ideas. Their products are sold in SO many different places, that it makes creating the album so convenient. You can find their goodies at Michaels, Joann's, Hobby Lobby, online, etc.


This page was recently featured on the me & my BIG ideas blog. Everything I used is listed there. Come take a look! I LOVE using the POCKET PAGES & all the little goodies that go along from Specialty Cards to stickers. I can't wait for family to come over and look through my albums. I think they are really going to enjoy them.


 Also, don't forget... it's my birthday and everything in my shop is 15% off. Simply use the coupon code HAPPYHAPP15 at checkout! :)


Wednesday, December 11, 2013

Painted Mixed Media Christmas Card

5 comments

How fun is this little painted Christmas tree? 
Do you like to make your own cards or gifts? 
Today I have a perfect little project to share! I painted this mini Christmas scene for a holiday card. But, it could easily be made into a canvas for a bit of whimsy art or framed for a gift. It was super easy and fun! Let me tell you how I created it!

First I used a heavy duty piece of card stock from some packaging that I saved from the recycle bin for the base. I created a mixed media background using layers of paper, stamps, ink, pen, acrylic paint and rub ons. Then I used some fun patterned paper from me & my BIG ideas to cut out the shapes for the tree, trunk, presents, and half circles along the top. I didn't measure. I just cut away. :)

Using some matte Mod Podge I glued the scene together. Once that dried, I added paint to each piece lightly with acrylic paint. I wanted to tone down the patterned paper a bit, but still allow the designs to show through. This is a great way to tone down bright patterns for your scrapbook layouts too. A thin layer of white gesso always does the trick for me!


Finally, I added details like shading, bows, and Merry Christmas stickers from Cosmo Cricket. I used a small white button for the tree topper, attaching it with some E6000 glue (use with GOOD ventilation!). Once my mini canvas was complete I added it on top of a few paper layers. Everything was placed onto a card (just some folded white card stock) and now it is ready to send out! 

The great thing about this card - the recipient can stick it in a frame and have it as Christmas decor for years to come. A sweet, festive card perfect for gift giving. 

PS I also think this would be a GREAT project for kids to make as gift too!!

Happy Creating,

Tuesday, December 10, 2013

Book Page Wreath Revisited

0 comments


I just love this wreath I made at the beginning of this year. It is one of my favorite things hanging in my house. I thought it would be fun to share this project again because it would make a fantastic, handmade gift or a bit of festive fabulousness to hang in your house.

I think I am going to make another one for our front door. In my head I see a bit of Heidi Swapp gold Color Shine spritzed onto the paper rolls for a bit of bling and some pretty Christmas ornaments for the center. Sounds divine!

Come read my original book page wreath post right HERE!

Happy Creating,

Friday, December 6, 2013

Quick & Easy Holiday Card

1 comments

Here is a super quick & easy card I made using the me & my BIG ideas CARDS in an INSTANT. Seriously, so super easy!

I don't know about you, but I love making my own cards for Christmas, birthdays, or what ever the occasion may be. (DIY wedding card) It just means a wee bit more to the recipient when things have a homemade touch. The mambi cards make everything so easy.

All I did was fold the patterned paper (already sized & perforated) in half, use some scraps from the large 12 x 12 mambi pack to run horizontally, then placed a card from one of the CARDS in an INSTANT pack right on top. I did add some black paper behind to help it pop off the page. I hole punched the top and added some decorative twine. Finally, I made a few of those darling snowflakes stand out by adding a white puffy snowflake sticker (mambi STICKS). Too cute!


On the inside, I didn't want it to be plain white, so I glued a piece of the pretty aqua paper to the bottom. Then I placed the matching card on top. I slipped doilies under the card on the top & bottom. Now, it's done and ready to be given to someone special.

It really was quick and easy! :)
Come see my card on the me & my BIG ideas blog right HERE!

Next time I will share a mixed media Christmas card. It will be a little more messy (yay!), but who doesn't love some paint on their hands!?

Happy Creating,

Monday, December 2, 2013

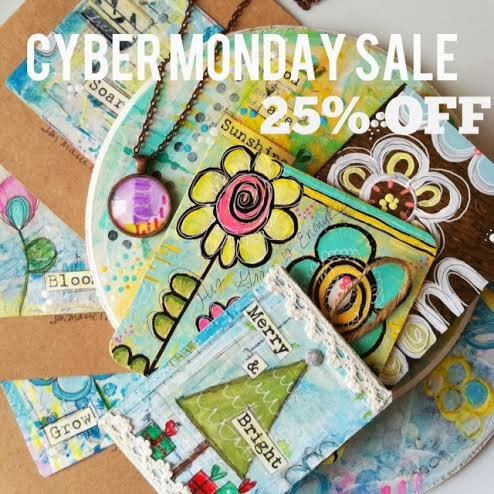
Cyber Monday Sale - 25% off Entire Shop

0 comments


It's Cyber Monday! 
So I have my entire ETSY shop on sale. Everything is 25% off.
Just enter: CYBERMONDAY25 for your coupon code.

Come back and visit too! 
I will be adding a few more originals throughout this week and next.

I am off to do more Christmas decorating. 
Have you already decked your halls?
I wish I could leave it like this all year! :)