Friday, October 4, 2013

"Faux Flair" Friday - Make Your Own

1 comments


I don't know about you, but I have a ton of paper. I mean A LOT. After doing oodles of mixed media, art journal, and scrappy projects... I also have a TON of scraps. I just can't seem to throw those pieces away (they usually end up in my mixed media backgrounds). I am always thinking of ways to use them up. I bet you are too! 


  Lately, flair buttons have become super popular. There are so many cute designs! I adore them. I thought it would be really fun to try and make some of my own. I think making my own adds a little homemade feel to my projects and I can alter them any way I need to. It is such a perfect way to match embellishments to whatever projects I am working on. Seriously, after making a few...I am sold, and there is just so many options to make them unique. Here is what I did! 

 1) I gathered up all my fabulous scraps. I always keep a small recycled container by my Project Life/scrapbook station (hello, dining room table) and my art table to collect bits of paper.  :)


2) I used a one inch circle punch and punched away. I like to punch a bunch out at one time. That way I have them ready to go for any crafty project.


3) Once my circles were ready I decided to embellish some, doodle some words on a few and left some plain. I also loved using little word stickers. This is a GREAT way to tailor your flare to your needs!


4) Finally, I used some Spare Parts (the Paper Studio) 1 inch epoxy stickers and added them to my punched circles. It can be a little tricky to center the epoxy right onto the circle, but you can carefully trim around the edge after if needed. I don't mind the imperfection at all. 


5) I turned each "faux flair" over and rubbed the paper on the back to make sure I got any air bubbles out. Again, I am not a factory and they may have imperfections. Especially, if I altered the circle with something that had  dimension...the sticker may not lay completely flat. No problem!

Look how cute they turned out! Eeeek, LOOK at that gold beauty in front. I made that one from a mambi Specialty Card. The glittering star is Dear Lizzy paper and a Stickerdoodle sticker. Too cute!

Here is a "faux flair" I made for an embellishment cluster on a 12x12 layout recently. Adorable, right!? That heart was created from one of the me and my BIG ideas 3x4 POCKET PAGES card packs. I simply punched it out & added the epoxy sticker. It was a cinch and it added some needed dimension. Not to mention adding to the cuteness factor. ;) (Layout post coming in the future.)


I am in love with this crafty process! So, I will be making some more. There are all kinds of things to be done with them - add to a Project Life layout, attach to an altered canvas, layer up a card, personalize a journal, and so much more.


Come back next Friday when I show you how I made some mixed media flair!! I KNOW you what to get those hands messy...so, I will see you right here next Friday! :)


Happy Creating!

Friday, September 27, 2013

Exciting News! me & my BIG ideas Design Team

2 comments

Look at that!
I am so super excited to announce that I have been chosen as one of the new members of the me & my BIG ideas DesignTeam! I feel very honored to be in the company of these creative ladies above. I can't wait to share various artsy projects, scrapbook layouts, Project Life spreads, mixed media canvases, art journal pages, etc using fun mambi goodies. I will be sharing all kinds of inspiring goodness right here on Sadie Inspired as well as my Instagram & Pinterest. Come say "Hi!" I would love for you to come follow along. 


Remember this fun up-cycled canvas made with a mambi 4x6 POCKET PAGES card & the packaging?  You can read all about it right HERE.  I am looking forward to creating more goodies very soon!

Happy Creating Friends,

Friday, September 13, 2013

A DIY Wedding Card

2 comments
I love weddings. Don't you? There is something so magical about seeing a gorgeous bride walk down that aisle in her beautiful gown. I have been to so many weddings and they all have that little bit of magic. :) With another wedding right around the corner for a family friend, I was inspired to make something unique, special and classy. I also wanted to include a bit of sparkle to capture that magical spirit that was sure to be flying around.

 
I was looking through my stash of creative goodies and I knew I wanted to use a super cute patterned paper from the Becky Higgins Project Life Midnight Edition by Liz Tamanaha (whoa, is that a mouthful!). Remember, I wanted something with a bit of bling too and the new Pocket Pages Specialty Cards from me & my BIG ideas were the perfect compliment. Holy Smokes, do I LOVE their new line of cards! They are so fun with super fine glitter and foil added to their already darling cards. They are so perfect for my Project Life albums and projects like making cards too. I can't wait to use more of these bedazzled goodies in several projects I have planned.

For my wedding card I just used white card stock as the base, added the Midnight Edition paper that had been trimmed down, and began layering the mambi cards. I also used one of the 4x6 title cards in black & white wood grain from the Midnight Core Kit as a base. I just love how versatile all the pocket page cards from the various manufactures can be.


I also used some plain white vellum to soften up the layers a bit. I added some black grosgrain ribbon and some thinner black satin ribbon under the layered paper to make a tied closure. I fell in swoon-y love with the large glittered ampersand and made it the central focus of the card. I added black corrugated Thickers from Amy Tangerine (found at TJ Maxx) on either side. An itty-bitty silver heart fit perfectly inside both of the letter Rs to match the fabulous silver glittered circles on the mambi card.  


Doesn't the black and white look pretty with the neutral palette of that patterned heart paper! 
I just love it. 
Elegant, Classy, and Sparkling...exactly what I hoped for.
Now,  I have to figure out what to wear! :)

I hope you are having a creative, happy week with a bit of magic!

Friday, August 16, 2013

Martha Stewart Gesso & Goodbye Summer

0 comments


Holy Smokes! How are you? All I can say, is that I blinked and summer disappeared. Literally...poof! My family and I had a wonderful time enjoying the warm weather, a fab vacation to Mammoth Lakes, baseball games, and all the good things that summer bring. I am so sad to see it go! My daughter just headed back to school this past Wednesday, so it is back to schedules, homework, and busy! I am happy to say though, I live in southern California...so the flip flops aren't going anywhere for awhile. :)

As I was packing up artsy goodies for our family trip to Mammoth and a Hubby & me trip to Vegas, I knew I wanted to bring along some gesso. I use it all the time. It is my absolute "go to" product for pretty much anything I am working on. I didn't want to bring my large container of Liquitex, so I ran over to Michaels (I seriously should work there) to see what I could find.

I found a small bottle of gesso by Martha Stewart that looked perfect. It was just a little bit bigger than a bottle of craft paint. I also HAD to buy this inexpensive Artist Loft set of watercolor. I mean, I HAD to - they shimmer! I am a lover of all the shimmer, the shine, the glitter, the sparkle. So these looked like a ton of fun. When I got home, I tossed them in my bag thinking I would have time to give them a try. 


 Fast forward to Mammoth. We did a whole bunch of this...


 ...so, there was not a lot of time for creating. Which was fine with me!

 But, when my husband & I went to Vegas, I had plenty of time. He had conferences all day so my art journal kept me company. I really liked using the Martha gesso. I liked trying something different. The consistency is pretty fluid, but grainier than the Liquitex. Once I spread it out over the page it became much more creamy in texture. It is thin and shows layers well, which I like. You will need to use a couple of layers if you want something completely covered though. I am going to stick to my favorite Liquitex, but I will also love changing it up from time to time. Hmmm, or better yet...maybe another mini vacation! Hint. Hint. :)

  
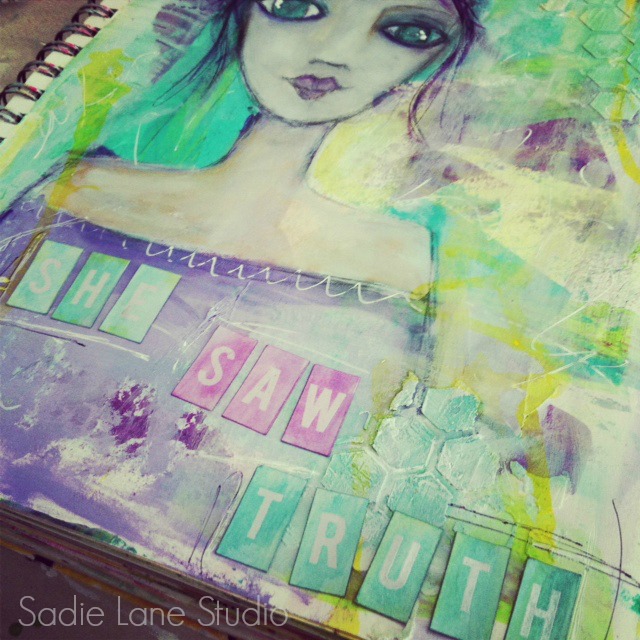
I got started on this girl while in Vegas and finished her up at home. I used some of the watercolors too. I'll talk about those later on in another post. But, let's just say - I love them! I also used some alphas from Heidi Swapp that can be inked, misted, or painted to change their color. I loved using them too and can't wait to do more projects with them. 


I hope you have had some fun creative time. Are you working on any projects?
DO tell...and HAPPY creating!

Don't forget to come find me on Instagram!! I'd love to see you over there.
I am @sadieinspired