Saturday, June 30, 2012

Insta Love

3 comments
I have had a hard time getting to the computer this week to post.
It has been full on summer mode in our house - which I love!
So I thought I would share some Instagram love from this week... beach time, date days, hometown visits, pool days with great friends, sprinklers & water balloons, and lots & lots of ice cream! : )

Here are a few favorites....

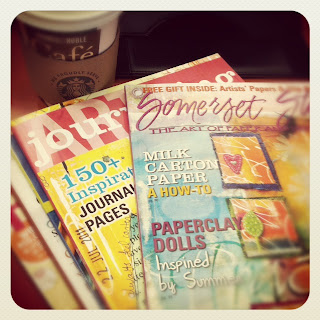
Date night with the cutest boy ever, reading new magazines...so much inspiration!

A day at the beach. I grew up at the beach, so it always feels like a little bit of "home" to me. :)

The kids went to Grandma and Grandpa's to spend the night with their cousin, so we had the day to ourselves. We hit my hometown...and spent the day playing, eating (yummy build your own veggie burger), relaxing, movie watching, and just plain ol' fun!

Water balloon fights with lots of little girls and screaming. :)


...and the cutest summer toes ever!! 

I hope you are having a wonderful week!

XOXO,


Friday, June 22, 2012

Catch Up Friday

10 comments
Happy Friday!


I know I have said before how much I am enjoying my Life Book class with Tam Laporte. It has been so refreshing each week to have a new lesson or activity or interview to watch. The best part is being exposed to all the different instructors. I am LOVING that! I always find it so fascinating to watch an artist and her process. Very inspiring!! Tam just recently announced that there will be a Life Book 2013 too. Yay!

Even though I love the course, I am having a hard time "keeping up." I put parenthesis around that because there is NO pressure at all and the course is designed so that you have access to the videos for quite some time. BUT, I paid for the class...I want to learn...I want to do the lessons...so, I need to get my tush in gear!! :) Plus Tam is doing a giveaway to encourage us to  treat ourselves to some art time and complete a lesson that we haven't done yet. Soooo, I was minus some kids yesterday (Thank you Grandma!) and found some time to work on one of Mystele's lessons.

I had created this background a couple weeks ago...


I added more layers of acrylic, pen, stamps, doodles. I wish I had my brayer. YES! It is still missing. It must be hiding somewhere in my house with the Blue Ray remote. My son is a master at finding new homes for things! :)


Then, like magic, shapes and figures began to emerge. A story began to unfold right there on the canvas. I didn't have any idea what I wanted to do as I started. Just as Myste demonstrates...stories can be "pulled" right out of the background already created. Little pieces of the puzzle begin to emerge and pretty soon I have a little piece of my heart laid onto canvas.


I have finishing touches to add. But, I really love working this way: creating a yummy, collaged background; then throwing whatever arty goodness I can reach onto it; finally "pulling" a story from it. LOVE. (By the way - I have NO idea if I punctuated that last sentence correctly. Don't hate on me if it is wrong. Lol.)

Life Book WIP
 You can tell I like girly, whimsy, and cutesy. I'll be back to show her off when she is all done. (PS I love that the word popping through in the large flower was written by me a looooong time ago in grade school.)

Are you taking any classes that you are loving???

Joining the lovelies over at Paint Party Friday and Studio JRU

Monday, June 18, 2012

Summer of Color 2 - Mint Chip

20 comments
I hope everyone had a wonderful weekend. I had a chance to finish a journal portrait for The Summer of Color 2. The ice cream inspiration was mint chocolate chip. YUM!! I thought I would be using my larger journal for the challenge...but, why limit myself right?? I just keep grabbing for my little 5 x 8 journal. I am only doing little whimsy girls in it, so it seems pretty logical for this one. ;)


Well, and of course I use any excuse I can find to get new paint. So I headed over to Michaels to see what I could find. The fabulous hostess Kristin had suggested the Martha Stewart line of craft paints to me awhile back and ever since - new obsession. (I keep telling the Hubs...my obsessions could be worse. I mean, the MS paint only costs $1.99 a bottle. I could easily be addicted to collecting shoes. He prefers the paint. LOL) I found a paint called Mint Chip in a pearly finish. Swoon! It is super pretty.


For this girl I sketched her with a regular mechanical pencil. Then painted her using acrylic paint, Caran d'Ache Neocolor II crayons, Inktense pencils, and Sakura Gelly Roll pens in white & Green Star (LOVE!).


She's a cutie! :)

Here she is Instagram style. Come join me @sadieinspired!!
XO,

Friday, June 15, 2012

DIY Father's Day Gift Idea - Tutorial

7 comments

I love taking pictures and making handmade gifts for those I love.
I would love to share a little project my kids and I made a couple 
months ago for my Hubby's birthday.
It would make a perfect gift for Father's Day! I know any dad, grandpa, uncle, papa, or friend would be happy to get something special like this. It is super easy and with Father's Day approaching in the States this Sunday - You still have plenty of time!! So, get those camera's out and let's go!!!


Supplies:
Camera
Frame with 3 openings 
Plastic tray from the Dollar Tree
Paintbrush
Piece of Chalk
Scissors
Red construction paper
Super cute kids
Candy: Totally optional, but it makes the super cute kids smile really big! :)
Chalkboard Paint (Now let's break this down...I used the brand Folk Art. It is what the craft store had at the time. I know there is chalkboard spray paint. You can pick that up from places like Lowe's. I have also heard that Martha Stewart's chalkboard paint is great as well. I want some Annie Sloan paint - but, it is expensive! I'll have to wait for a furniture project for that.)

The first thing you want to do is paint the clear tray with chalkboard paint. I had to paint many coats to make it truly black. Don't be alarmed when you start painting and it is super thin. Have faith. It will get darker as you continue to add layers. Be sure to let the paint dry completely before putting on another coat. I suggest painting the tray on a previous day. The best part is...after you are done, you have a great little chalkboard to use for other projects. I attached a rope to the back and hung mine over a desk in our hallway. It is a fun place to write words, quotes, or messages.


Next cut out various hearts from the red construction paper. I cut out two so each one of my kiddies could hold a heart. The size of your clan will determine how many hearts needed. 


Once your tray is dry, write the word "we" and decorate it a bit if you want. 


 Now, you have your cute chalkboard with the word "we," some red hearts, and some super cute kids. This is the time to bring out the candy. :) Find a place to take your pictures. Keep in mind that you want the words and adorable faces of your children to stand out...not a busy background. Think - backyard fence, garage door, porch, pretty field. Snap away!! When it is time, get some pictures with the word "You" and the red hearts.


 Finally, choose the pictures you like and edit them if you want. That is another optional step of course. But, I have to give a quick plug to PicMonkey. I LOVE it. It is free (for now) and has some very easy tools for editing your little gems. They even have ready made collage frames. LOVE it! After you print your gorgeous photos, pop them in the frame and poof - fabulous gift!


Super easy!
Super inexpensive!
Super fabulous! 

Oh, by the way...here are some reasons why a little bribery may be in order...


I am sharing my project with Crafty Scrappy Happy and Sneak Peek Friday!

Have a beautiful weekend!

Monday, June 11, 2012

Rainbow Sherbert - SOC 2

27 comments
Happy Monday!
It is pure happiness in the Randall house because it is officially summer vacation. Yiiippppeee!
My daughter's last day of school was Friday (after a whirlwind of a week)!
I am really looking forward to slower mornings, lazy summer days, and family fun over vacation. How about you? We are just waiting for my Hubby to finish two more weeks and then he has a month off. Serious party time! :)

The weekend was fabulous and started with a little celebration on Friday for my Sugarbean's passage into second grade. She thinks she is all gown up now. Lol. Then we had dance pictures on Saturday in her new costume for her July recital. Absolute pink cuteness! I am not a fan of the studio pictures so I took her down to the lake for a mini photo session. LOVED the outdoor pics so much better! I had a date night Saturday with my cutie husband and saw Snow White & the Huntsman. Sunday was all about church, art time, frozen yogurt, and a lost tooth. Yep. We had a visit from the tooth fairy last night!


Now...a perfect summer kick off - The Summer of Color 2 hosted by Kristin.
Like I mentioned before, the theme is Ice Cream Inspirations and the first flavor choice is rainbow sherbert. The color inspiration is a bright combination of pinks, oranges, and yellow. On my last post I shared the backgrounds I had created with paper towels for texture. Using Mystele's pulled art technique, I had a quirky cotton candy haired girl pop out of the background. It is pretty amazing to see what images or shapes you can find hidden in your background creations.


The texture is really yummy. I used acrylic paint, watercolor crayons & pencils, pen, and typed up the saying on the computer. She is not perfect and I can't seem to make eyes that look the same. One eye is always a little wonky. But, I am totally OK with that. My mantra - Perfection is boring. :)


Then, I couldn't stop using these fabulous colors, so I painted one of my little girlies in my portrait journal. I usually create these sweeties without faces, but today I felt like giving her a face. That sounds pretty funny. 
I think she is adorable.


Same supplies were used on her except I added some scrapbook paper for the collaged flowers and the Welcome Summer "sign." I am obsessed with headbands and flowers in the hair.


My daughter loves to wear headbands. I usually have to talk her into clips, ponytails, or pigtails. So I think that is where my inspiration comes from.


I hope you enjoyed my rainbow sherbert creations. I know there is tons of arty inspiration over here. I can't wait to look around. Come take a peek! 

XXOO,


Saturday, June 9, 2012

Today...

5 comments
...this is on my table. I think I may have a couple hours to play today too. Yippee!


I have these background pages waiting for me. The colors are so bright & fabulous, right? The orange, pink, and yellows are a beautiful starting point for Kristin's rainbow sherbert color choice this week for Summer of Color 2


Last month the kids and I made some construction paper flowers to brighten up the house. We used coffee filters with markers for the center of each flower. It is super fun for the kids. All we did was take a white coffee filter and fold it in half about four times. Use regular old markers and make pretty designs all over the filter. Then simply place the tip of the filter into a bowl of water. The kids love to watch the ink spread as the water travels up through the filter. I carefully open it up and lay it down on a paper towel to dry. 

I used those same paper towels on these journal pages. 
I just glued them down with Mod Podge. 
It creates lots of pretty color and texture. 


I also have this collaged background ready to go for one of Mystele's Life Book lessons. I really love the colors on this one. I am so drawn to blues, grays, and greens lately. The best thing about this page though is the old school paper with spelling words written on it.  
That is actually mine
I found a bunch of my old school work when I was cleaning out my old trunk. I kept a few because I am nostalgic and will use the rest for collage. SO happy!!
It's always fun to use little pieces of your own history. :) 

Look at that penmanship! :)

I'll be back on Monday to show off my rainbow sherbert pages complete! (Hopefully...)

Find me on Instagram @ sadieinspired or you can see my feed here!

Have a BEAUTIFUL weekend,

Sunday, June 3, 2012

Art & Ice Cream

4 comments
Don't you just love that combination?
Art and ice cream...ahhhh!

I mean really, let's talk ice cream. I love it. How could you not? Well, OK - the bazillion calories may not be the best. My hips completely understand that. :) I will admit - I am a chocolate girl at heart. I would go for the double chocolate mocha fudge brownie every time. I am not kidding. The more chocolate the better! My hubby (remember, opposites attract) on the other hand is all about strawberry cheesecake ice cream. It has to have a vanilla base or he won't touch it. The kids...they will eat practically anything if it is in a cone.   
 (Hmmmm, veggies in a cone?)

Sooooo, summer + ice cream = heaven.
A perfect summer afternoon for me might be strolling around Balboa Island with a big cone in hand or a lazy day in the backyard with the kids running through the sprinklers to rid themselves of the streams of ice cream all over their messy little bodies. Wait! Better yet, when I was a kid - going to Farrell's for a birthday party where they bring out a boat of ice cream. (Seriously - a boat. At least that's what it looks like from a child's point of view!)


Now, since I am a dairy free girl - I love coconut ice cream for a little treat. I have tried it all - soy, rice, almond. I think coconut tastes the best. I honestly don't eat ice cream that much anymore, but when I do - I don't mess around. :) This Mocha Almond Fudge should be called So Dangerous & So Delicious. Lol.

 
I could eat the whole thing...easy. SO yummy!

Why a mini ice cream obsession? I am sure many of you already know.
Starting Monday June 4th, my friend Kristin will be hosting...


Soooooo, summer + ice cream + art = even MORE heaven!!

It is a fun, free, color challenge that is a great way to get messy and meet new bloggy friends. I had a blast last summer, so I have my 9x12 Strathmore Journal ready to go. 
Come read about it here!
You can read a few of my Summer of Color posts from last year here, here, and here.

I hope you join in and by the way...what flavor is your favorite?
XOXO,


Friday, June 1, 2012

The Final Five

20 comments
29 Faces has come to a close this month and I finished all 29 faces!
I am glad that I took part in this challenge. 
It pushed me to make time for creativity every day. 
My little 5 x 8 Strathmore journal is filling up with all kinds of portraits, so I think I am going to continue filling it up with more. But, I do admit...after many cute faces...I am ready to get my hands messy with some abstract pieces. :)

Here are the final five ...

Faces 25 & 26
I was thinking of my beautiful daughter when I was creating this page. She is growing up so terribly fast. I hold on to every snuggle, cherish when she says "I love you Mommy," hold her hand whenever I can, love her girlish giggles over the silliest of things, and adore her child like wonder over a tiny dragonfly flying in our backyard tonight after dinner. These moments won't be here forever, but they will forever connect our hearts. Oh, how I love that girl!

Face 27
I love how this sweet girl turned out. She is one of my favorites. She was sketched in pencil, covered with a bit of gesso, then painted with acrylics and just a bit of watercolor crayons.

Faces 28 & 29
These two girls were drawn as I watched The Tudors marathon on the BBC.
It sucked me in. 
Kings, queens, costumes, crowns...I can't help myself.

So, there they are! 
I would love to thank Ayala Art for hosting 29 Faces in May.
Also, thank you so much for all the wonderful comments and visiting me. :)

Joining Paint Party Friday and Sneak Peek Friday. Come stop by!